Windows CHKDSK Utility
The Windows chkdsk utility made my day today! Someone brought in what looked like a seriously messed up Acer Travelmate laptop which refused to boot in its Windows operating system. I was able to fix it by running chkdsk.
As you may know, chkdsk is a built-in (system) utility in all the latest versions of Microsoft Windows that allows you to check your hard disk for errors and make repairs. It’s quite possible to be using your computer for months without ever running into chkdsk, or without even knowing that such a thing exists.
What most people don’t realize though, is that running chkdsk on your hard drive from time to time can reveal hidden errors that cause your computer to run slowly or perform sluggishly. In some cases, it can even save you a trip to the computer repair store if your pc completely locks up.
I’ve also recently seen a case where running Windows 7 chkdsk solved a “hard disk running out of space” problem when the disk was actually only half full.
How to Run Windows chkdsk
Normally, you shouldn’t see any signs of the chkdsk utility’s presence in your Windows operating system. You’ll only see it when you call for it. An exception to this rule is when Windows decides to flag your hard drive as “dirty”. This can happen for instance when a power failure occurs during a disk write action or when Windows is not shut down properly.
If your hard drive file system is flagged dirty, your pc will run chkdsk on sartup every time you power on your computer. I’ll show you how to check for the “dirty” flag on your hard drive later in this article, but first let me show you how to run the Windows chkdsk utility.
How to Use CHKDSK
You can run Windows chkdsk in two ways: via Window’s graphical user interface or via chkdsk commands in command-line modus. I’ll show you how to run chkdsk commands and some chkdsk parameters further down below, but for now, let’s concentrate on the more “user-friendly” version.
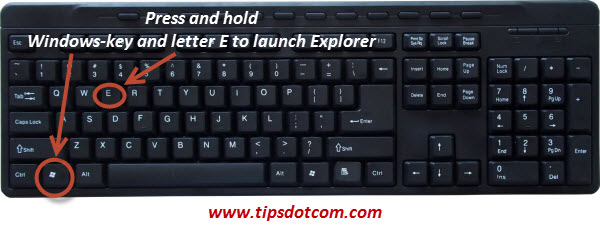
The easiest way is to open up a Windows Explorer window. Press Windows key and letter “E” combination on your keyboard to launch Windows Explorer.
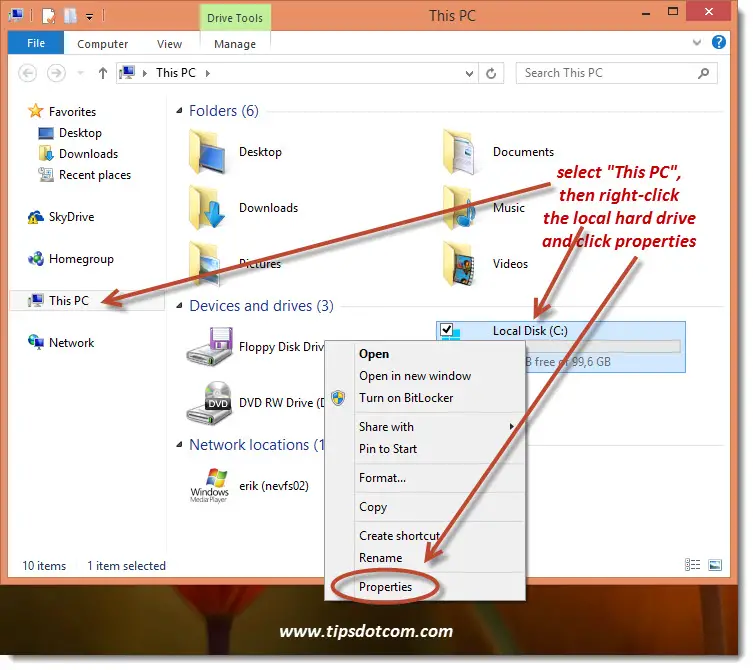
In your Windows Explorer, make sure to select the “This PC” icon in the left-hand side of the window, then right-click the local hard drive you want to check and select “Properties”, like in the image below.
Then, in the drive properties window, select the “Tools” tab and click the “Check” button.
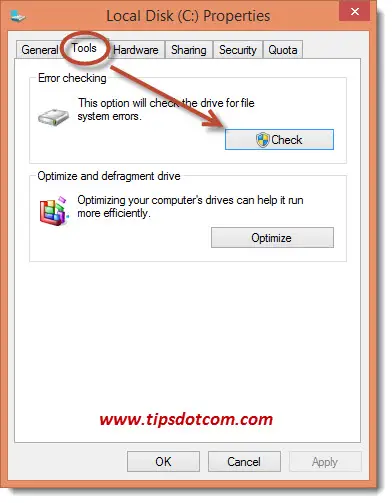
What happens next (after clicking the “Check” button) depends on whether you are using Windows 7 or Windows 8.
Windows 8 chkdsk
If you are using Windows 8, there’s a good chance that you’ll see a dialog box similar to this one
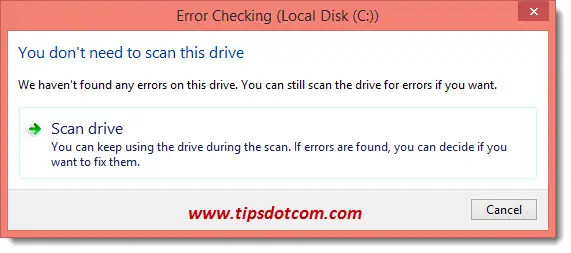
That’s because Windows 8 has probably already performed one or more chkdsk rounds in the background without you even knowing it. Windows 8 does this as part of its standard system maintenance routine.
If you still want to force chkdsk to run, click on “Scan drive” and you’ll see a progress dialog like this:
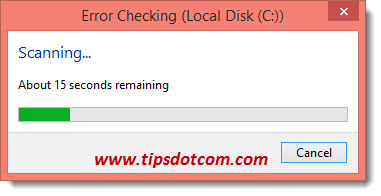
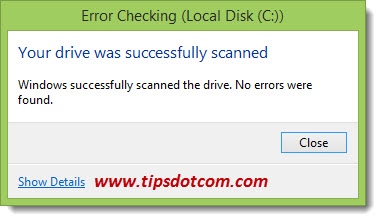
Shortly after, you’ll see the results of your Windows 8 chkdsk utility.
Windows 7 chkdsk
If you are running Windows 7, this is what you’ll see after clicking the “Check” button in the drive properties window:
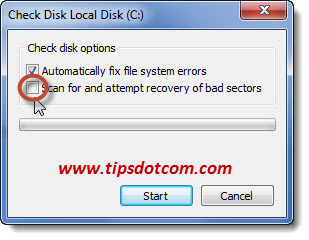
Please notice how the checkbox next to “Scan for and attempt recovery of bad sectors” is NOT checked by default. Check the box and click start.
Now you’ll see a message that Windows can’t perform the check on the hard drive while it’s in use and you’ll be able to schedule a chkdsk at next startup.
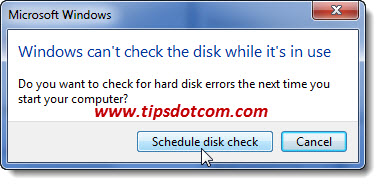
The next time you start your pc, you’ll see a notification that chkdsk will run first, prior to loading the Windows operating system.
Windows CHKDSK utility in command line
If you want to run the chkdsk command from a command prompt, you’ll need to open an elevated command prompt first.
In the elevated command prompt, enter
“chkdsk c: /f /r” (without the quotes). Note that the c: indicated which hard drive to scan for errors and that you can recplace c: with any drive letter in your system.
Pretty much like in the graphical version of the Windows chkdsk utility described above, you’ll also get a warning that chkdsk can’t run on a file system in use and it will ask you whether you want to schedule chkdsk at next startup.
Type “y” to schedule the Windows chkdsk utility to run at startup.
chkdsk Runs Each Time You Start Your Computer?
Sometimes your hard disk file system can get flagged as “dirty”, which
is an indication for Windows that it needs to run the Windows chkdsk utility before loading
the operating system.
You can use the chckntfs command in an elevated command prompt to check whether your file system has been flagged dirty.
Type “chkntfs c:” (without the quotes) in an elevated command prompt (the c: can be replaced by any other drive in your system).
If you notice that your file system is marked dirty, you can cancel the scheduled chkdsk by typing
“chkntfs c: /x” (without the quotes).
Related articles: Windows 10 chkdsk and Running chkdsk on ssd drives.
If you've enjoyed this article or found it useful, I'd appreciate it if you'd let me know by clicking the Like (or Share) button below. Thank you!


New! Comments
Have your say about what you just read! Leave me a comment in the box below.