Create a Desktop Background Slide Show
Setting a desktop background slide show is a super-easy way to save your computer from boredom. It gives your screen a fresh, new look every time you look at it. What’s more, it keeps your picture galleries and photo albums right in front of you, which sure beats having them tucked away collecting digital dust in an obscure corner on your hard drive.
It only takes a moment to learn how to set up a background slide show and you will enjoy the benefits for a long time to come. Plus, you can save the money that you would otherwise have spent on a digital photo frame for something more interesting.
Setting Up a Desktop Background Slide Show
Press the Windows-key + d on your keyboard to go to the desktop.
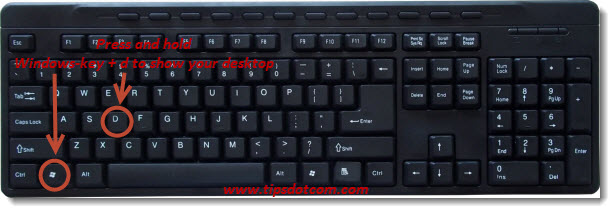
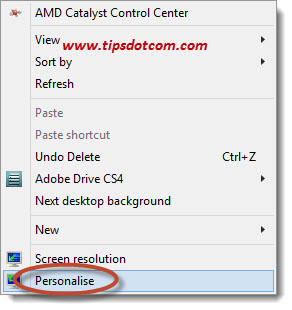
Then, right-click on an empty space on your desktop and select “Personalize” from the menu that comes up.
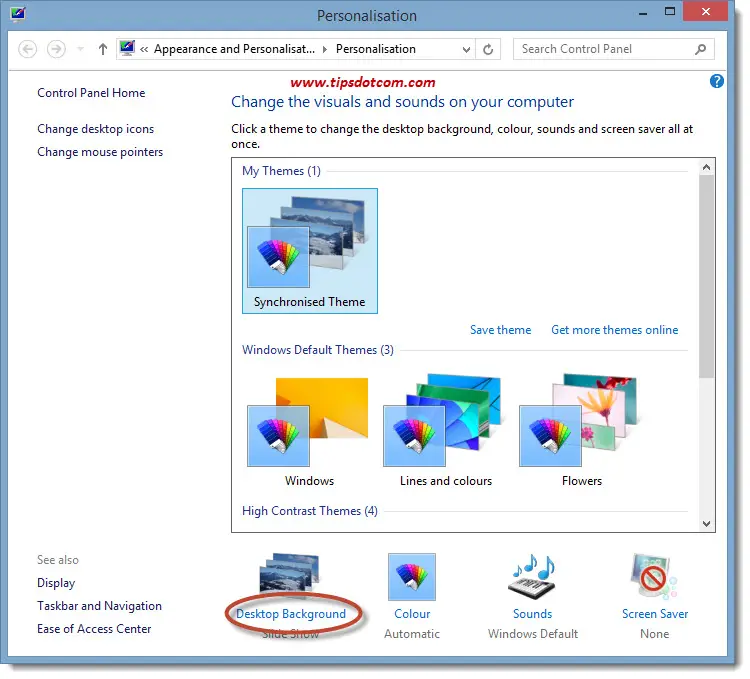
Windows will now show the personalization screen, where you can click “Desktop background” to go to the desktop background settings.
This is what the desktop background settings screen will look like:
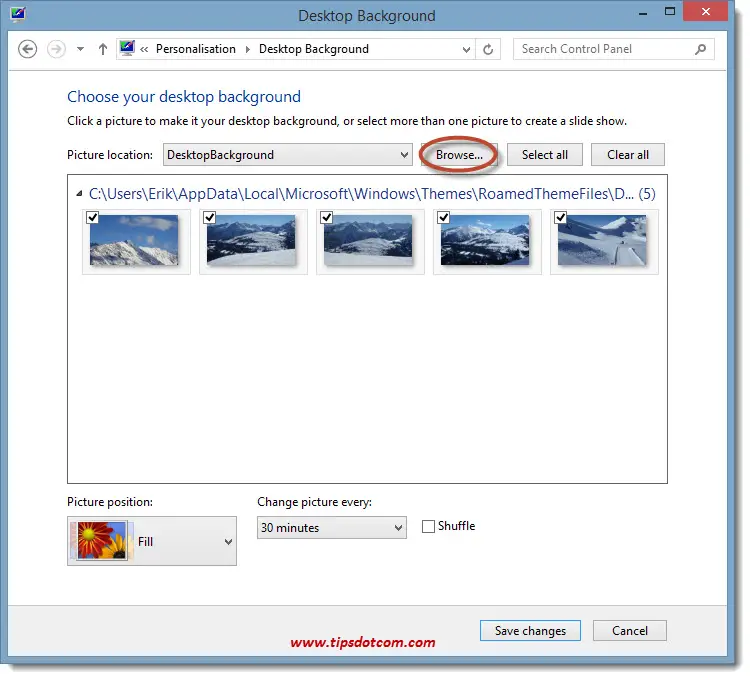
Now you can use the browse button (see image above) to browse to a folder on your hard drive where your images are located. This can be any folder on your hard drive, but Microsoft hasn’t included the possibility to include subfolders. If you’re like me and you have your photo’s organized in folders, you might feel disappointed because you can’t simply point to the main folder and have the images in your subfolders included straight away.
What, really?
Personally I think it would have been a nice feature to be able to select a “main” folder and have the photos of the underlying subfolder included in your desktop background slide show, but unfortunately we have to get a little creative if we want that.
Two Ways To Create a Desktop Background Slide Show With Multiple Folders
If you want to create a desktop background slide show with images from multiple folders, you can of course create a new folder, copy all the images that you want to use from their different folders into that new folder and work from there. That would be a first way to set up a background slide show with images from different folders, but you would end up with several copies of the same images on your hard drive, which sort of defeats the purpose of having them organized in folders. Plus, even though hard disk storage has gotten relatively cheap these days, there’s no need to be wasting gigabytes of storage by keeping multiple copies of your images.
That’s why this second, more interesting option of setting up a desktop background slide show with multiple folders might be a better idea. It requires a small application called Desktop Background Tuner, which you can download here.
As soon as you’ve downloaded the zip file, open your Windows Explorer and navigate to the location where you saved it.
Note: If you still have any desktop personalization windows open, you should close them first before launching Desktopbackgroundtuner.
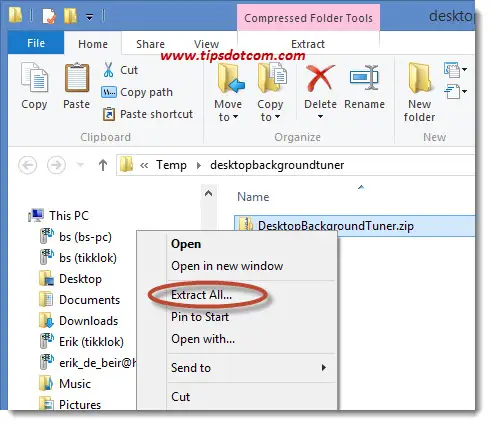
Then, as in the image below, right-click the desktopbackgroundtuner.zip file and select “Extract All”.
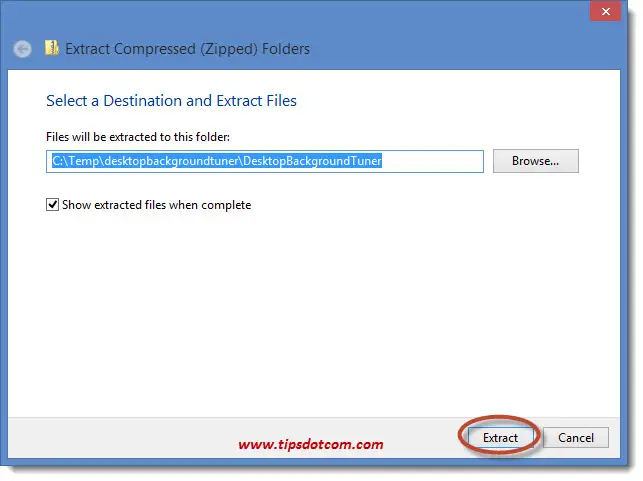
This will take you to the screen where you need to select the destination folder. You can leave the default suggestion as is, but make sure to have the checkbox next to "Show extracted files when complete" selected.
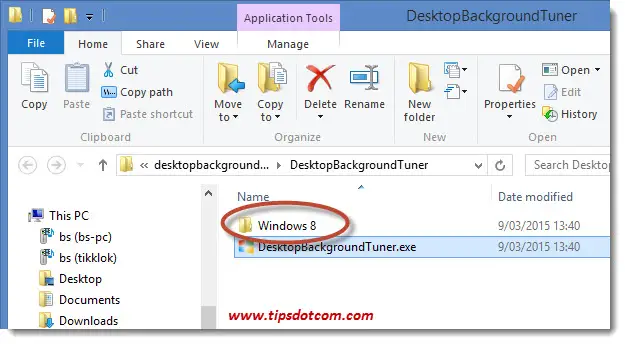
Next you will end up in the folder with the extracted files, where you can immediately double-click the program file of Deskttopbackgroundtuner.exe to get started (don’t forget to double-click the Windows 8 folder first if you are running Windows 8).
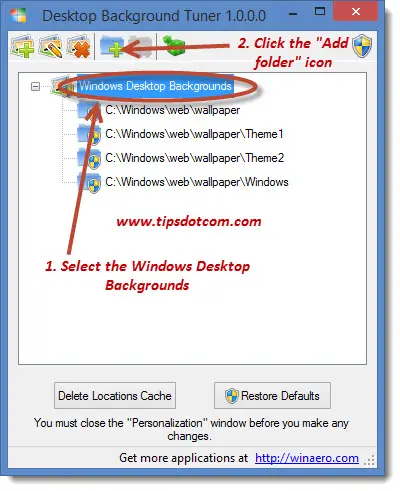
The Desktopbackgroundtuner application will open up, so you will now be able to select multiple folders with images to create your desktop background slide show.
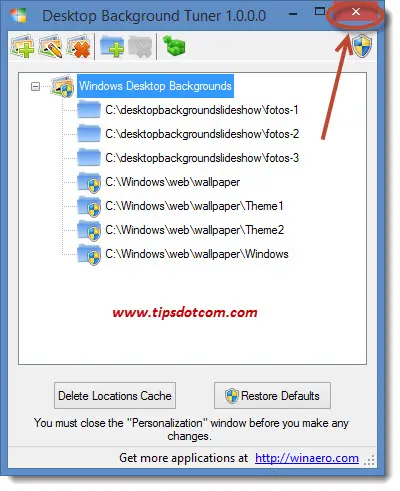
In the main application window, make sure to select the Windows desktop backgrounds branch and then click the “Add folder” icon in order to add your specific folders to the desktop backgrounds, like illustrated in the image below.
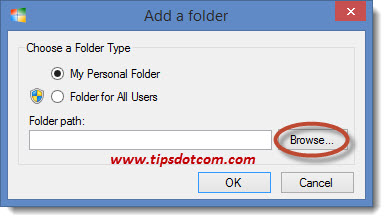
In the “Add folder” dialog screen, click the browse button to select the folder with the images of your choice and then click ok.
The selected folder will now appear along in the list of desktop backgrounds. You can add as many folders as you like by clicking the “add folder” icon again.
When you are ready, simply click the red “x” in the top right corner of Desktopbackgroundtuner and go back to selecting your desktop background slide show, as described in the beginning of this article.
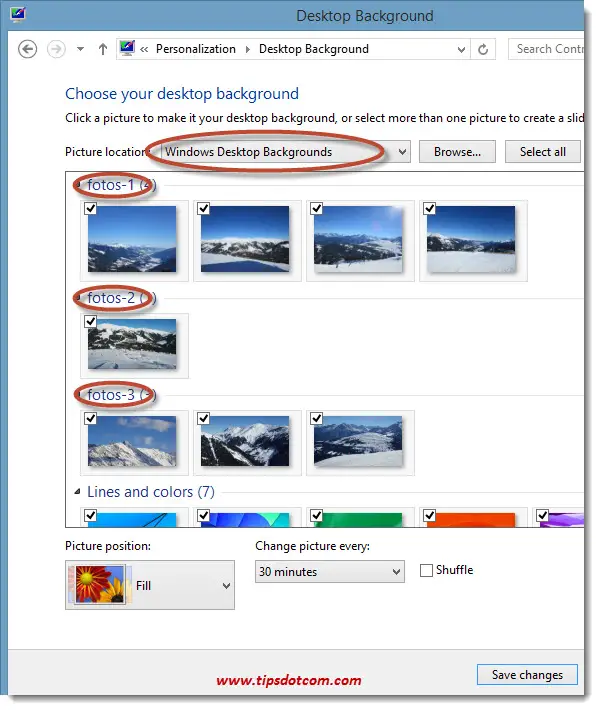
You will now notice that, upon selecting “Windows Desktop Backgrounds” in the picture location, all the images from the different folders will be there.
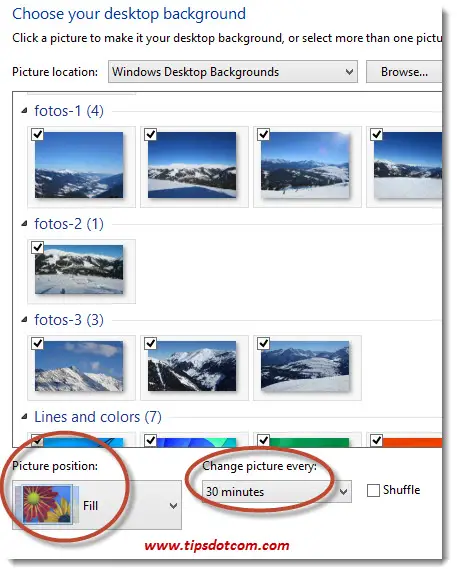
You can also play with the settings for “Picture position”, the duration
that each image will be visible in your slide show and whether or not
you want to shuffle your images.
So, in a nutshell, this is how to easily set up a desktop background slide show with your favorite images to make your desktop background look a bit more interesting. The great thing about the Desktopbackgroundtuner application is that you don’t even have to install it as an additional program on your computer, because simply launching the exe file will allow you to collect all the images you want from all the different folders you need. The application simply access a number of Windows registry settings, allowing you to use multiple folders for your desktop background images.
I hope this article helped you to set up your desktop background slideshow in the way you wanted to. Feel free to check out my other tips and tricks articles as well and please do take a brief moment to leave a comment in the section below. I’d appreciate it, thank you!
If you've enjoyed this article or found it useful, I'd appreciate it if you'd let me know by clicking the Like (or Share) button below. Thank you!


New! Comments
Have your say about what you just read! Leave me a comment in the box below.