Change The RDP Listening Port in Windows
You can change the rdp listening port in Windows by making a change in the registry. You’ll also need to configure an entry in the Windows Defender firewall to allow incoming connections on the port number that you’ve chosen for incoming remote desktop connections or else your remote desktop connection won’t work.
In this article I’m going to go over the steps to change your incoming remote desktop listening port and I’ll also show you how to add a new inbound rule in your Windows defender firewall to allow the incoming rdp connections. The default rdp port in Windows is port number 3389 but this can be changed via a setting in the Windows registry.
I’ve talked about other remote desktop possibilities before in other articles and for some of these methods you don’t have to worry about Windows Defender firewall settings, but if you are planning on using the standard Windows remote desktop protocol and you want to change the listening network port for rdp, then you mustn’t forget about the firewall rule.
With that being said, let’s first take a look at changing the listening port.
How to Change The RDP Listening Port in Windows
To change the RDP listening port in Windows, open the registry and navigate to HKEY_LOCAL_MACHINE\SYSTEM\CurrentControlSet\Control\Terminal Server\WinStations\RDP-Tcp. Double click “PortNumber” in the right hand side of the screen and select “Decimal”. Now enter your desired port number in the “Value data” field and click ok. You need to restart the computer for the changes to take effect.
Let's go over these steps in more detail below.
Open the Windows registry and navigate to
HKEY_LOCAL_MACHINE\SYSTEM\CurrentControlSet\Control\Terminal Server\WinStations\RDP-Tcp
You will then have a number of items on the right hand side of the screen in the registry editor. The one that we’re interested in is called “PortNumber”:

Double click on PortNumber to open it.
Windows will then open the “Edit DWORD” dialog where you can change the RDP listening port. Just make sure to click the “Decimal” radio button first. In the example below I have entered 3390 as the RDP listening port. Enter the value you want and click ok to confirm.
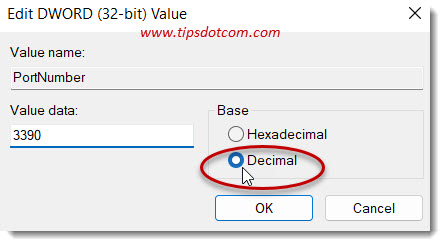
Now you can close the registry editor and restart your computer for the changes to take effect. Assuming that you have enabled the setting to allow remote desktop connections on your computer, all that’s left to do now is create a new rule in Windows Defender firewall to allow incoming connections on the port number that you’ve set.
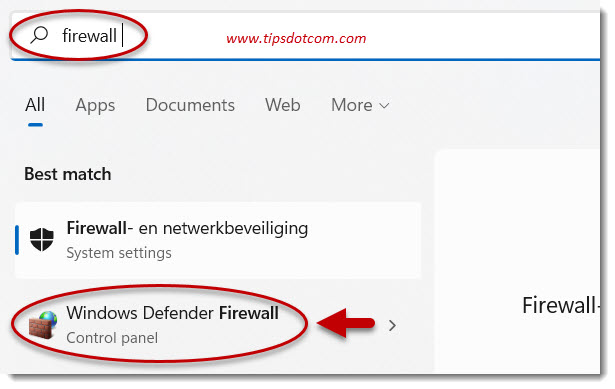
To do so, click the Windows start button and type “firewall” (without the quotes) in the search box and click “Windows Defender Firewall” under “Best match” to open Windows Defender firewall.
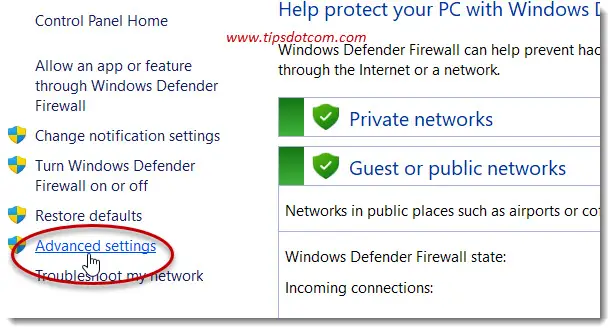
In the next screen, click “Advanced settings” to proceed.
Windows Defender Firewall with advanced security will now open. Click on “Inbound rules”.
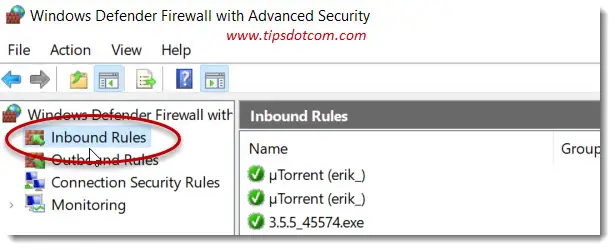
Now click on “New rule”.

Select rule type “Port” (Rule that controls connections for a TCP or UDP port) and click next.
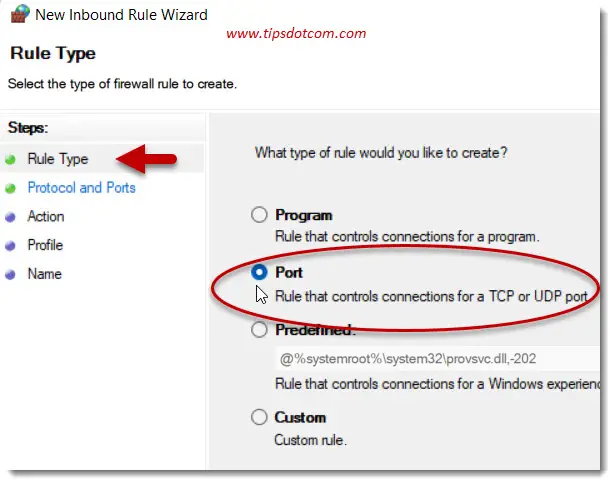
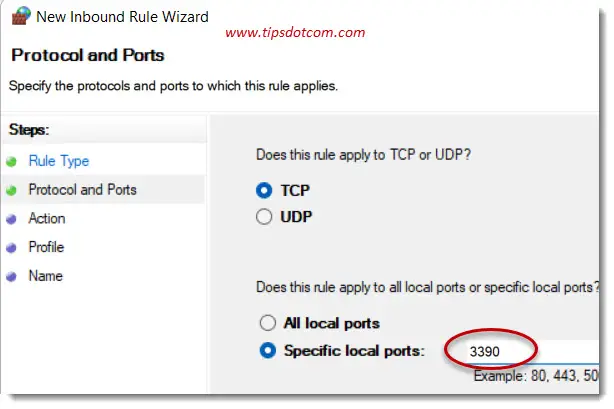
In the next screen leave the default selection at TCP and enter your chosen port number in the field “Specific local ports”. Then click next.
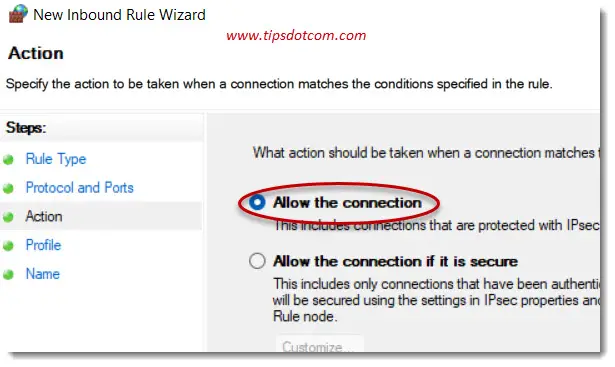
Now make sure to select the option to “Allow the connection” and click next to continue.
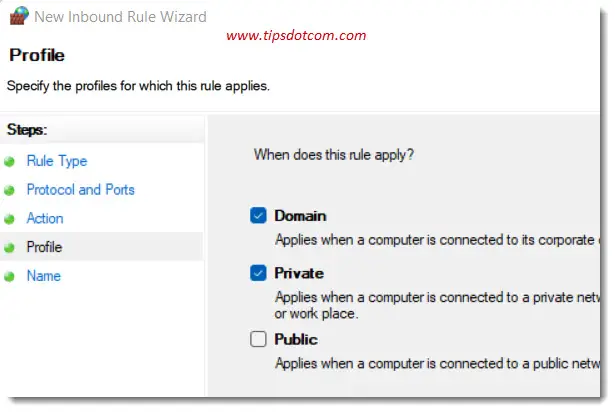
In the next screen you can deselect the option for public networks if you want and click next to proceed.
Now enter a name for your new firewall rule and click finish to complete your configuration.
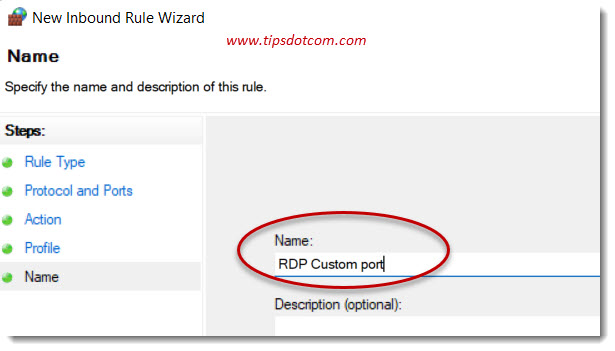
Your Computer is now set up to accept incoming RDP connections on a custom port and your Windows Defender firewall is configured accordingly.
This is how you change the RDP listening port in Windows while making sure that your firewall configuration doesn’t block the incoming connections.
If you've enjoyed this article or found it useful, I'd appreciate it if you'd let me know by clicking the Like (or Share) button below. Thank you!


New! Comments
Have your say about what you just read! Leave me a comment in the box below.