Change System Properties Logo
Need to change system properties logo and system information? In this article I’ll show you how you can replace the default system properties Windows logo with your own personalized logo and contact information.
Update: Please also feel free to check out my new article on changing Windows system properties logo information, with updates, additions and Windows 10 modifications. The article contains a link back here so you can continue reading afterwards.
The system properties logo and support details are what you see when you look at the system properties window on your computer.
You may not know exactly which logo or support information is currently show there on your system, so press the Windows-key + pause/break button on your keyboard to open up the Windows system properties information screen.
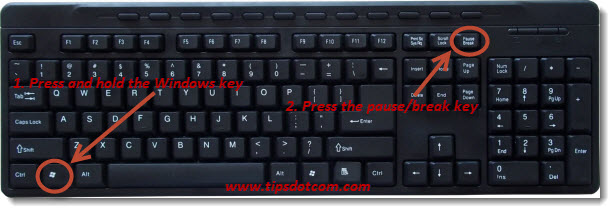
The Windows system properties on your computer will look a bit different, but here’s what it looks like on my computer.
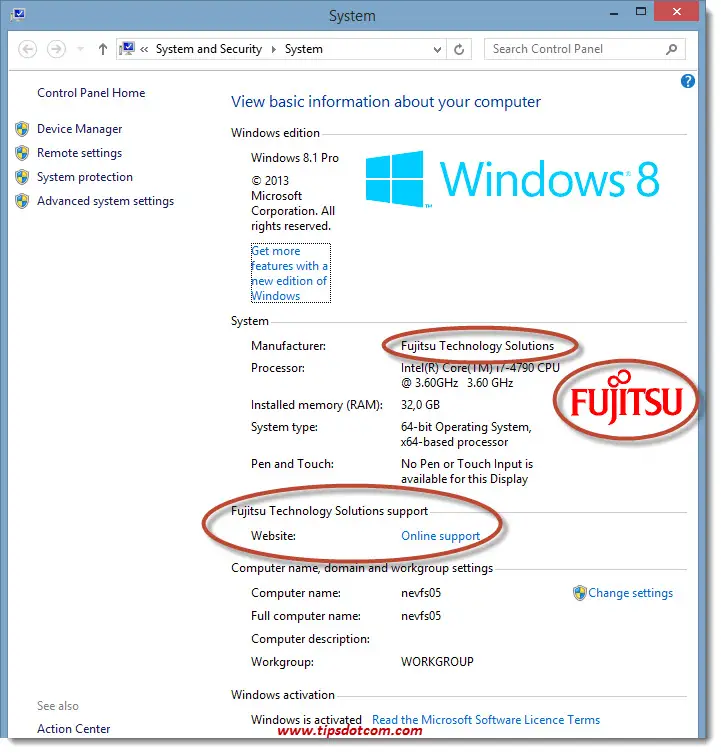
As you can see, it shows information about the manufacturer (Fujitsu Technology Solutions), the Fujitsu logo and a link to the Fujitsu support website.
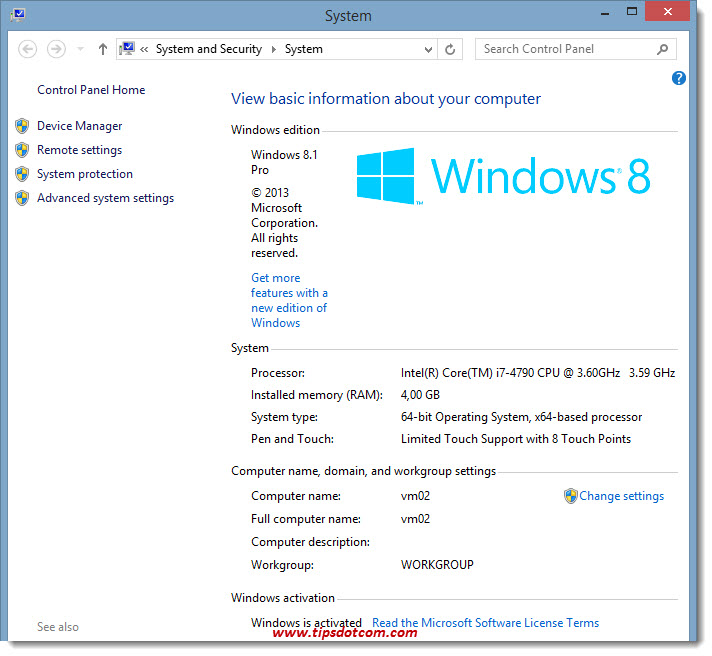
In some cases, it can also be that no logo or support information is present in the system properties window, in which case it will look more like this:
That’s all well and good, but what if you’re a systems builders and you want to put your own brand and contact information in there? Or if you simply want to help someone out and change system properties logo and support information in their system properties screen so they can find your contact details.
Luckily, the information in the system properties window is easy to change. Please read on.
Change System Properties Logo And Contact Information
You will need of course an image file containing the logo you want to place in the system properties window.
This file must be
- A bitmap file (.bmp file)
- 120 pixels wide x 120 pixels high
Once you have a suited file with your logo, you need to find out where to put it. Windows will look for a logo file with a specific name in a specific location. To find out what file name and which specific location, you’ll need to use the Windows Registry Editor.
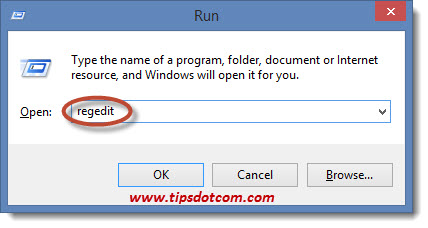
On your keyboard, press the Windows logo key + r in order to open the run command box.
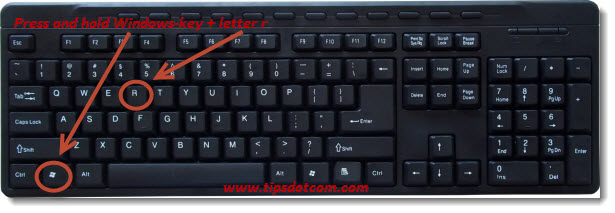
In the run command box, type “regedit” (without the quotes) and click ok.
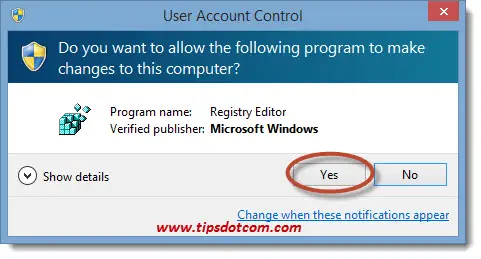
In the User Account Control window that comes up, click yes to continue.
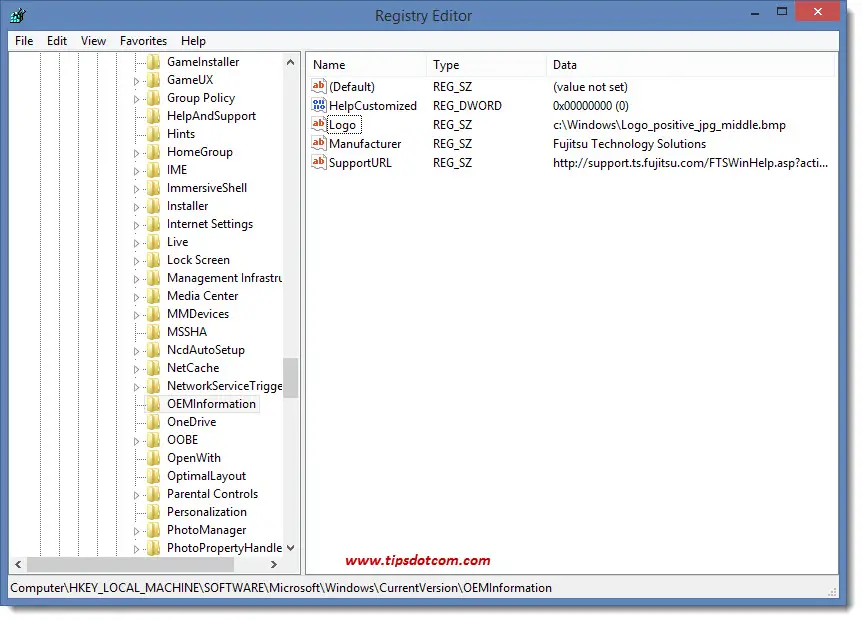
Navigate to
HKEY_LOCAL_MACHINE\SOFTWARE\Microsoft\Windows\CurrentVersion\OEMInformation
On the right-hand side in your Registry Editor, you might find a number of registry keys that hold the information about the logo file name, the system manufacturer and the support information, like illustrated in the image below.
Or, if you happen to be working on a system where no logo or support information is present, the system properties window will look more like this:
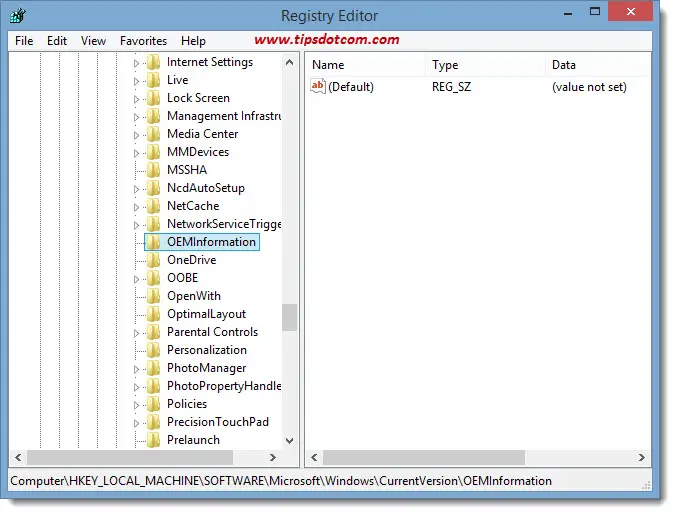
In that case, you will have to create the necessary registry keys in order to change system properties logo and support information. (If the registry keys are already there, you can simply change system properties logo and support information by double-clicking your existing registry keys and modifying the value data).
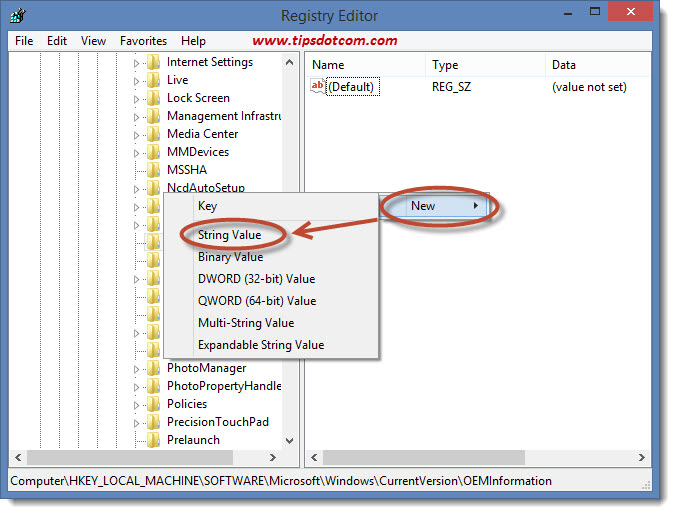
To create the necessary new keys, right-click in an empty spot in the right-hand side of your registry editor and select “new” and then “string value”.
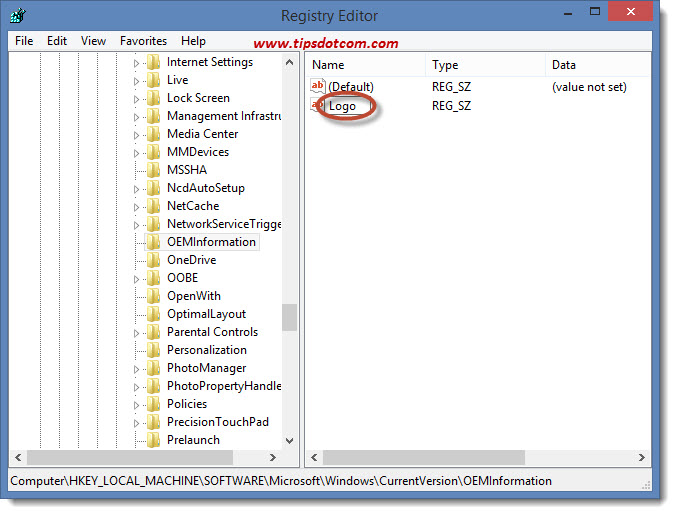
Type “Logo” (without the quotes) as the name of the registry key and press ENTER.
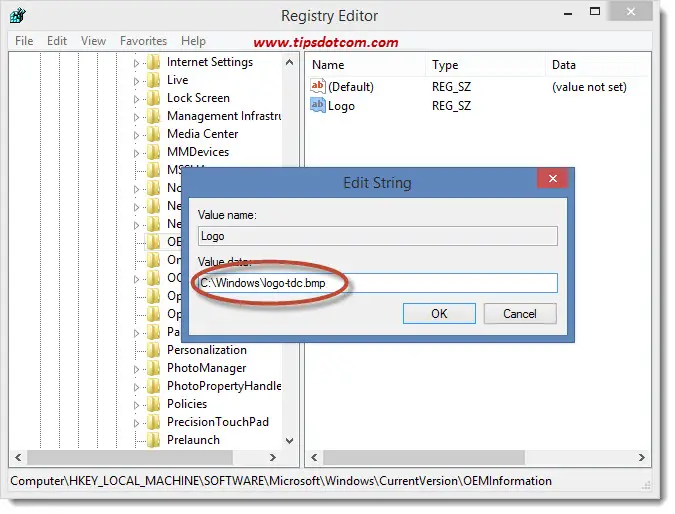
Now double-click your newly created key to start entering its value data in the “edit string” dialog box.
Enter the exact path and filename of your logo file (remember, it must be a .bmp file of 120 x 120 pixels). By default, the logo file is placed in your Windows system folder (usually c:\windows), so it wouldn’t hurt to place your logo file in that location.
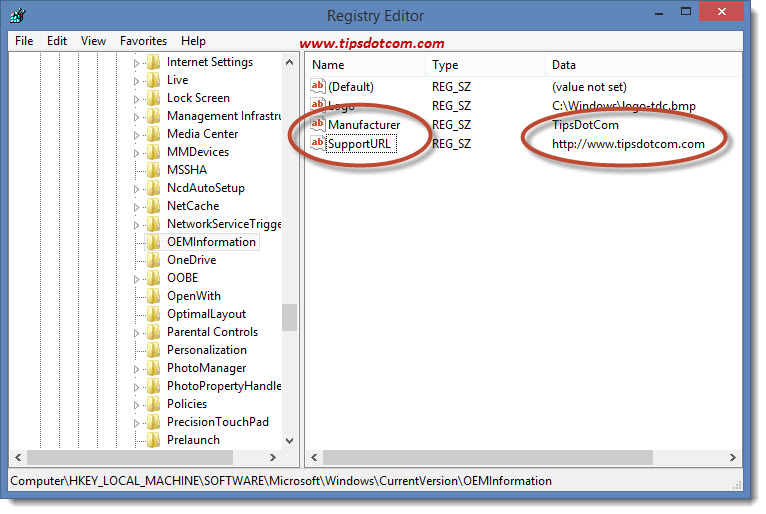
Now you can also create two more registry keys called “Manufacturer” and “SupportURL” by using the same steps as how you created the “Logo” registry key and entering your support details or branding information, like illustrated in this example:
As soon as you’re ready, you can test your work by using the Windows logo key + pause/break keyboard combination again to bring up the system properties window, which now looks like this in my example:
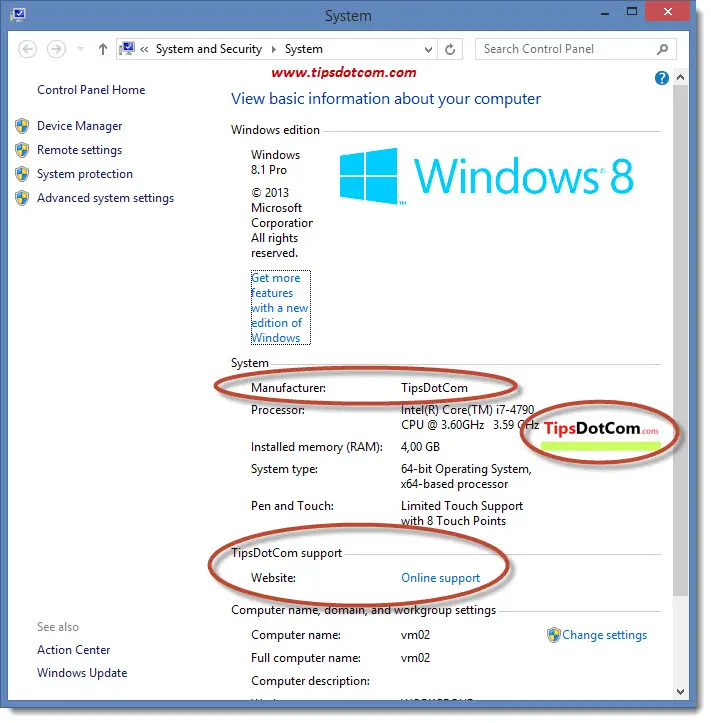
In the Manufacturer section in this example, you currently only see the name TipsDotCom, but of course you can also enter a telephone number or support e-mail address if you’d like.
I hope my article has helped you to change your system properties logo and support information. Please take a brief moment and leave a comment in the section below. I’d appreciate it, thanks!
If you've enjoyed this article or found it useful, I'd appreciate it if you'd let me know by clicking the Like (or Share) button below. Thank you!


New! Comments
Have your say about what you just read! Leave me a comment in the box below.