Windows 10 Chkdsk Disk
In this article I’d like to talk about the Windows 10 chkdsk command. What is it, what can it do for you and how do you use it correctly? A lot has been written about Microsoft’s built-in chkdsk utility and how it’s one of the most under-used tools for personal computers. I don’t know if under-used is the right word, but my take on it is that it can’t hurt to know a thing or two about it. Then you can still decide for yourself whether or not you want to use it more frequently.
The Windows 10 Chkdsk Command In A Nutshell
Basically, the Windows 10 chkdsk command is a disk repair tool. The hard disk drive in your computer holds a number of files and these files are organized in a file system. If you’re running any version of Windows on your computer, you’ll at least have a whole bunch of files that belong to the Windows operating system and that are needed for Windows to function properly. Windows 10 is no different at that. In addition to these operating system files, you’ll probably also have your own files like for instance pictures, documents or music files.
That’s all well and good, but why would you need a repair tool for that?
You guessed it right, you’ll need a repair tool in case something gets broken. And like Depeche Mode used to sing in their song “Precious”: “Things get damaged, things get broken”. Ain’t no different for the more mundane precious and fragile things in our world like file systems :-)
The Windows 10 chkdsk command is the repair tool that you can use in case something gets broken in your file system.
A Little More Background
You may be wondering how file systems can get damaged or if there’s anything you can do to prevent it. Well, actually there’s a wide variety of reasons why things can break bad in a file system and just below I’ve tried to illustrate a few scenario's.
In order for everything to work properly, Windows 10 performs a number of tasks in the background to make sure that all your data is stored safely, securely and in such a fashion that whenever a piece of information is needed, it can be pulled from your hard in the shortest amount of time that your hardware will support.
One of those tasks is indexing. Windows creates an index to be able to quickly locate and access any file it needs within the gigabytes or even terabytes of data on your hard drive. You could think of an index like the table of contents or the index in a book. The index in a book will also help you to find information more quickly, very much like the index in a file system will help Windows to retrieve any file that you are searching for.
Improper shutdowns or program hangs can cause active indexing processes to terminate unexpectedly, leaving file corruptions or logical errors on your hard drive.
Another reason for corrupt or damaged file systems can be physical damage or deterioration of your hard drive. Bad sectors on your hard drive can easily cause errors or corruption in your file system.
Those are all scenario’s where Windows 10 chkdsk can get you out of trouble.
By the way, disk errors can manifest themselves in a variety of different forms. Your computer may perform slowly due to disk errors lurking around on your drive with no obvious error messages alerting you that something’s wrong.
That’s why it’s not a bad idea to run chkdsk every once in a while.
Running The Chkdsk Repair Tool
Press the Windows logo key + e on your keyboard to launch File Explorer.
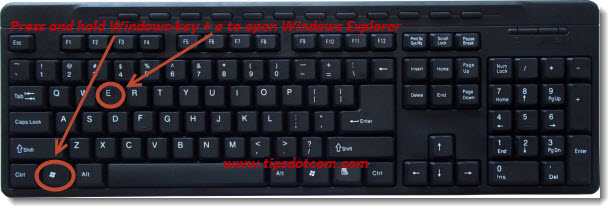
Windows will open File Explorer. Click the “This PC” link in the left hand side of the screen in order to show the connected hard drives.
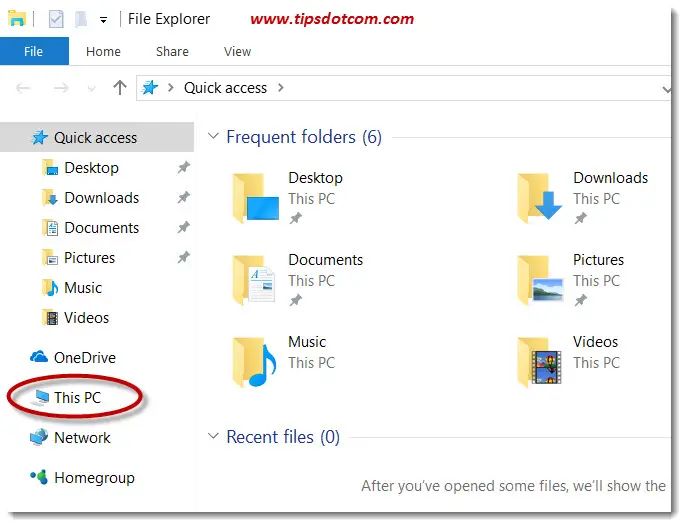
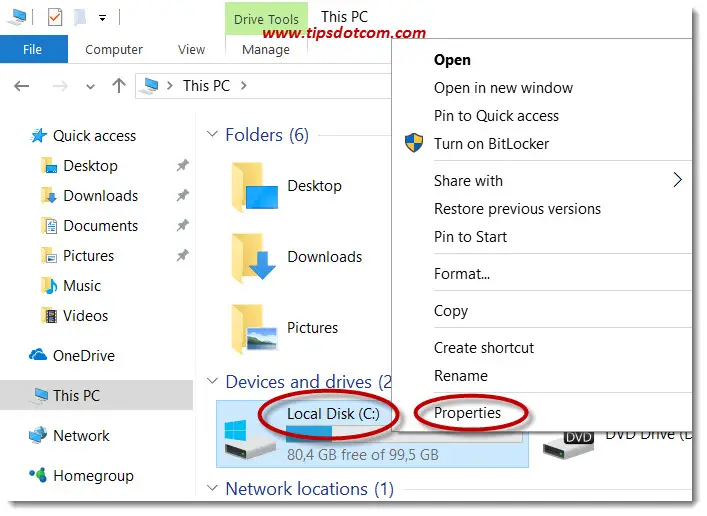
With the connected hard drives in sight, right-click the hard drive that you want to check for errors and select “Properties” (usually, you’ll want to check the local hard drive c: as this is the system drive containing the operating system in most cases).
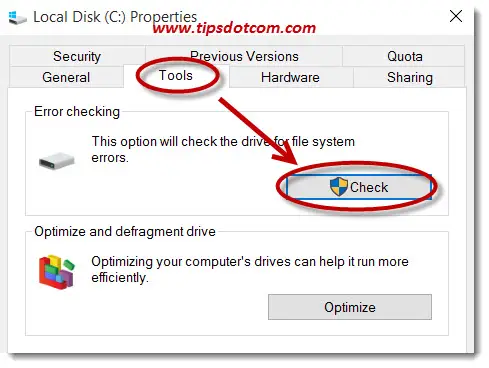
Then, in the local disk properties window, click the “Tools” tab and then click the “Check” button.
If you see a message that “You don’t need to scan this drive”, that means that Windows performed a recent scan in the background and that there were no errors to report.
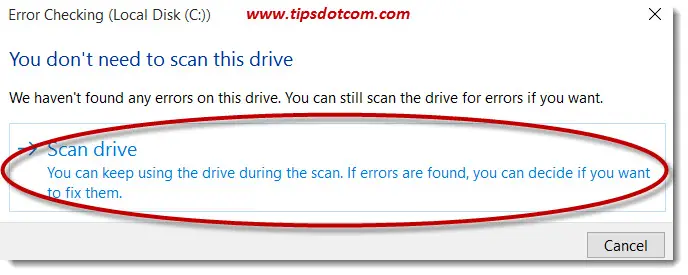
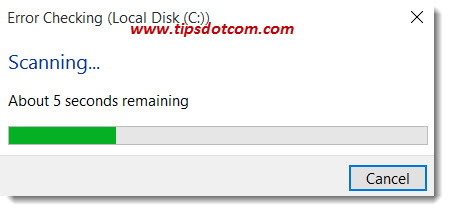
You can still decide to perform a scan. Click the “Scan drive” link in the window to proceed with the scan.
If Windows shows you an overview like in the image below, that would mean that your drive is in good health, at first sight.
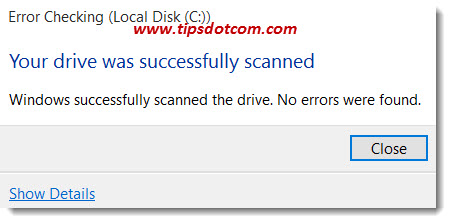
If any errors were found, Windows will offer an option to attempt to automatically repair the errors.
Taking It A Step Further
If you still want to perform an additional, more thorough scan, with the option of automatically repairing any errors that may surface, you can invoke the command line version of Windows 10 chkdsk.
Don’t worry if this sounds complicated, it isn’t. I’ll walk you through it.
First click the Windows start button in the bottom left corner of your screen, so that the Windows 10 start menu opens up.
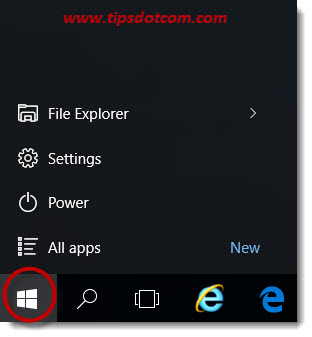
Next, with the Windows 10 start menu still open, type “cmd” (without the quotes) so Windows will show a command prompt item under “Best match”.
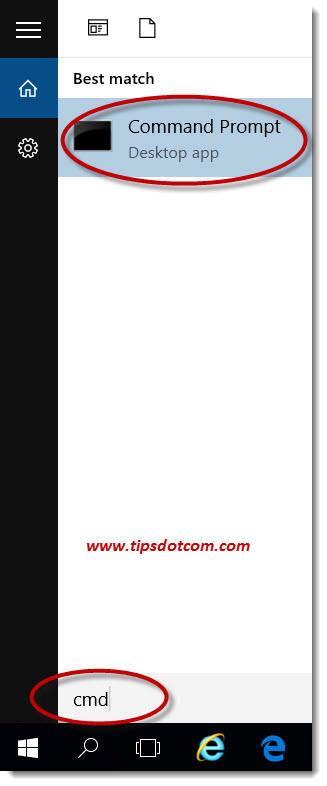
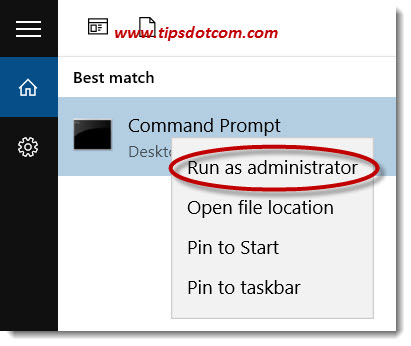
Then right-click the command prompt item and select “Run as administrator”.
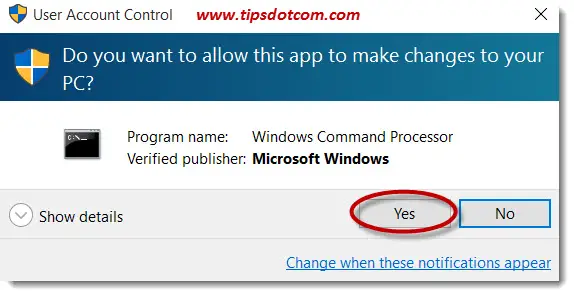
If a user account control screen comes up, click yes to continue.
Now a command prompt with a blinking cursor will be waiting to accept your input.
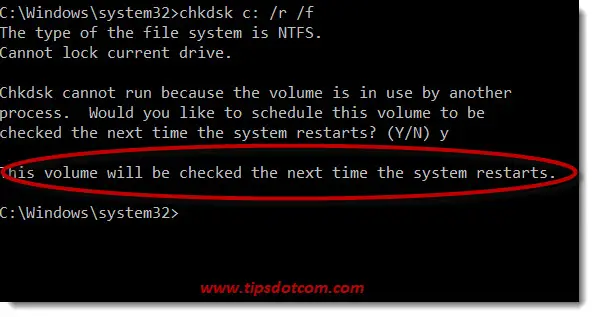
Type “chkdsk c: /r /f” (without the quotes) and press ENTER. (the /r switch in the command tell Windows to locate bad sectors and recover readable information and the f switch tells Windows to fix errors on the disk).
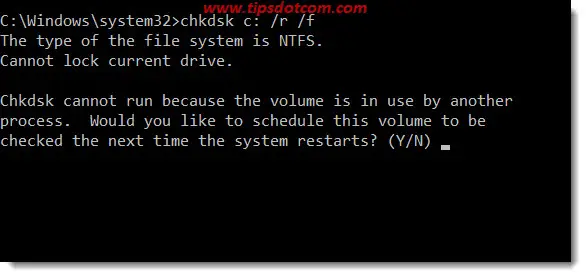
If you see a message that Windows cannot run because the volume is in use by another process, this is normal. That’s because a number of files on the disk are in use by Windows itself.
Windows also asks you “Would you like to schedule this volume to be checked the next time the system restarts?”.
This way you can schedule chkdsk in Windows 10 at the next reboot. This also illustrates that this type of scan is a bit more thorough than the previous method, where there was no problem running the scanning without restarting the system.
Type “Y” (without the quotes) and press ENTER to schedule a Windows 10 chkdsk upon the next reboot.
Windows will inform you that the volume will be checked the next time the system restarts.
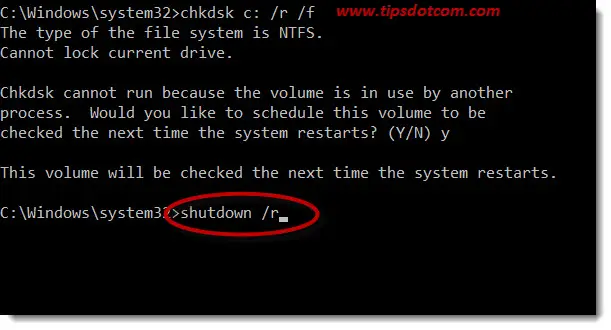
Let’s find out how that goes so type “shutdown /r” (without the quotes) and press ENTER to restart your computer.
Windows will now show a warning message to inform you about the imminent reboot.

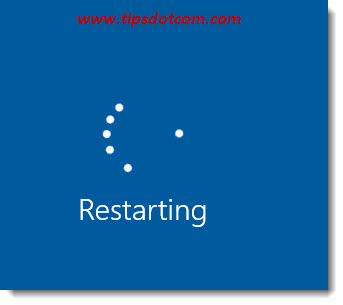
Then the system will restart for you ...
And start performing the error check on your hard drive.
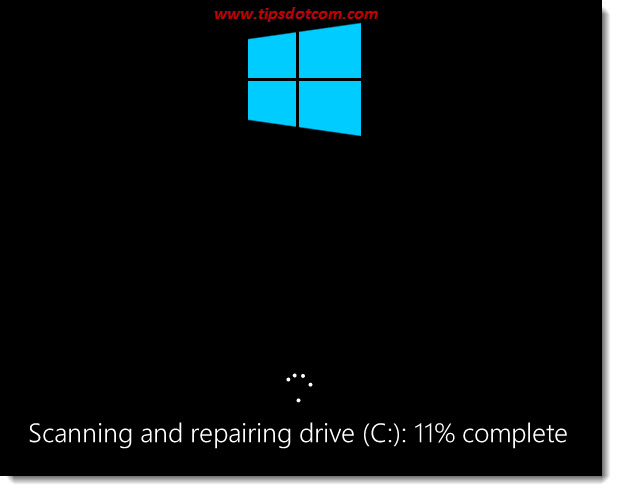
If any errors are found, Windows 10 chkdsk will attempt to automatically repair them and after the error scan, Windows will restart your computer once again after which everything should be ok.
With that you have performed a Windows 10 chkdsk command which may reveal hidden errors on your hard drive. Once you know about these errors and can have them fixed with chkdsk, you may be up for a better, smoother computer experience.
If this article was helpful, please feel free and leave a message in the section below, I’d appreciate it a lot, thanks!
If you've enjoyed this article or found it useful, I'd appreciate it if you'd let me know by clicking the Like (or Share) button below. Thank you!


New! Comments
Have your say about what you just read! Leave me a comment in the box below.