Windows 11 Start Menu Always Show All Apps
Want to make the Windows 11 start menu always show all apps by default? There’s an easy hack for that. It involves downloading a tiny, one-file open source utility called Explorer Patcher which comes with a bunch of other Windows 11 start menu customization features as well. If that sounds complicated, don’t be alarmed. It’s easy. And I’ll show you exactly how to get the job done in this article.
I’ve talked about Explorer Patcher before, in my how-to guides for hiding the recommended icons on the Windows 11 start menu and customizing pinned icons on the Windows 11 start menu.
I don’t want to sound too much like a fan-boy of Explorer Patcher, but when it comes to customizing the Windows 11 star menu, it’s simply a great utility that will help you get a few things done that simply can’t be done in Windows 11 itself. And when a nice free open source utility like that can help fix things that so many people are struggling with, I think it’s safe to say that it cannot be ignored. Feel free to read on so you can decide whether this is a utility you want in your toolkit. On top of that, you’ll be able to make the Windows 11 start menu always show all apps by default when you’re done with this step-by-step guide.
Why Make The Windows 11 Start Menu Always Show All Apps?
You might have noticed that the Windows 11 start menu doesn't show all your apps by default, but rather displays a “pinned” icons section and a “recommended” icons section. While there is not necessarily a whole lot wrong with that, a growing number of Windows 11 users are changing their start menu so that it shows all available apps by default.
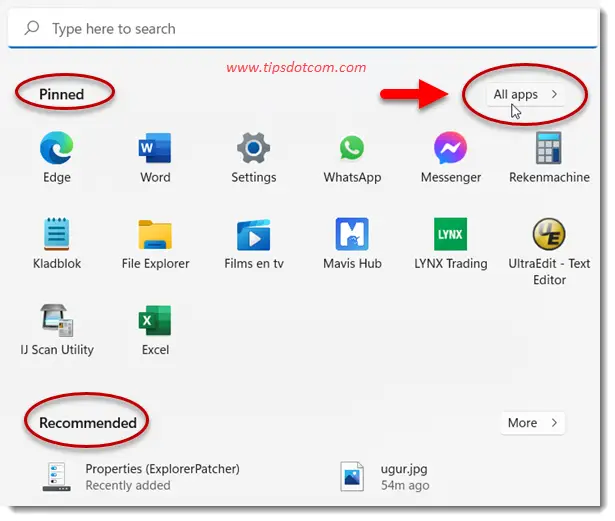
With the way the Windows 11 start menu is organized by default, you might not always find the app you need under the pinned or recommended section, which makes it necessary to click the “All apps” link in the start menu.
Luckily, with Explorer Patcher, there is a way to make the Windows 11 start menu show all apps by default.
How to Make The Windows 11 Start Menu Always Show All Apps by Default
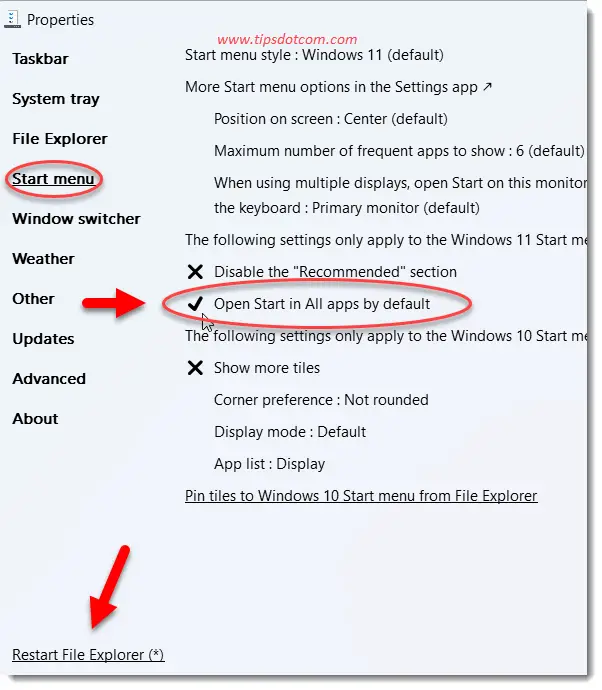
To make the Windows 11 start menu always show all apps by default, get Explorer Patcher, launch the utility and click the “Start Menu” section. Then, select “Open start in all apps by default”.
Let’s go over this step-by-step.
First, you need to get Explorer Patcher. You can simply Google it or download directly from here.
Then, go to the downloaded file (ep_setup.exe) and double click it to launch Explorer Patcher.
Windows might display a security warning message asking you if you are sure you want to run this file.
Click “Run” to continue.
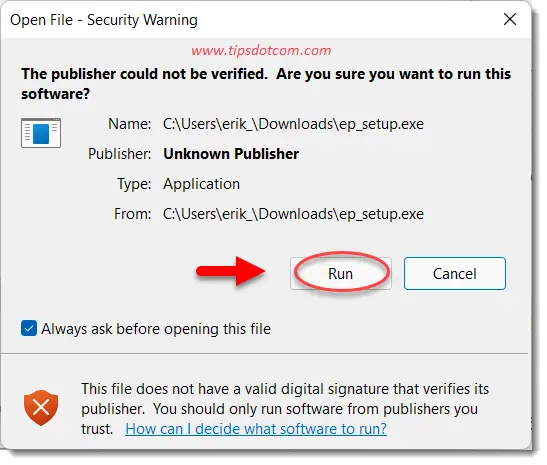
If Windows shows another message asking you whether you want to allow this app to make changes to your device, click yes.
Next you will see the Explorer Patcher screen come up. Make sure to click the “Start menu” heading in the vertical menu and place a checkmark next to the option to “Open Start in All apps by default”.
Then, click “Restart File Explorer” in the bottom left corner to make your changes take effect.
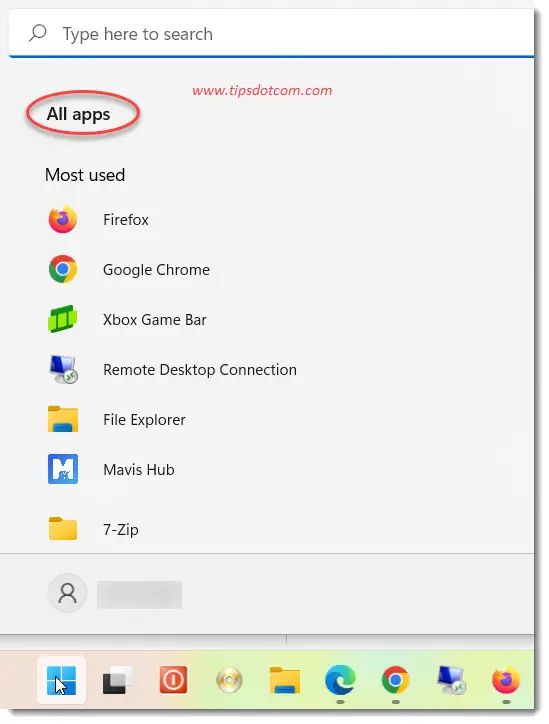
From now on, you will see that your Windows 11 start menu always shows all apps by default, much like it used to be in Windows 10. All your apps are available right away on your start menu, listed alphabetically.
As mentioned in the introduction, Explorer Patcher offers a whole bunch of other options for you to customize your Windows 11 start menu as well. If you want to go back to Explorer Patcher, you can always right click on your taskbar and select “Properties”.
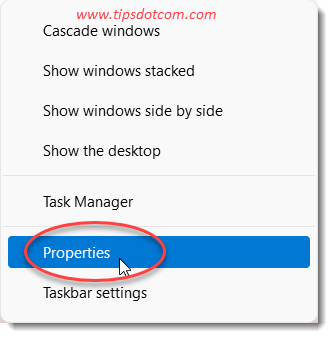
From there you will be taken back to the customization options on your Windows 11 start menu. Other options include making it look more like the “classic” Windows 10 start menu, removing the “Pinned” and / or “Recommended” icons or options to place the taskbar on the left of your screen rather than centered.
Feel free to check out my Windows 11 start menu survival guide to discover other options you can try out.
If you found this article helpful, please consider click the like button or leaving a short comment below. I’d appreciate it, thank you!
If you've enjoyed this article or found it useful, I'd appreciate it if you'd let me know by clicking the Like (or Share) button below. Thank you!


New! Comments
Have your say about what you just read! Leave me a comment in the box below.