Google 2 Step Verification - Quick And Complete Guide
Using Google 2 step verification may sound like a hassle when you first hear of it, but it can actually be very un-hassling once you set it up, plus it will significantly lower the chances of your account getting hacked. In addition to that, you will also be able to do certain things with your Google or Gmail account that aren’t possible without 2 step verification. This and a lot more will be covered in this article so let’s dive in and explore.
2 Step verification basically adds an extra layer of security on top of your Google or Gmail account by requiring an additional step to prove that it’s actually you who is trying to access your account. It’s a proven method which is adopted globally and can also be found with other online services such as Microsoft accounts, Apple ID’s and all other major players.
Before 2 step verification, someone who had your password could sign in to your account from his or her computer and you wouldn’t even know it. Now, in addition to providing your password, you need to perform one extra step in order to prove that it’s actually you before you can access your account. That blocks anyone else from accessing your Gmail, even when they figure out a way to get your password. (If it sounds cumbersome to have to perform an additional step to sign in to your Gmail account, keep reading as I will also cover how you can avoid this while still enjoying the extra security benefits).
The second step in the 2 step verification process is usually an action you need to take on your phone, so you will need to add your phone number to your Google account. That way, someone would need to be in possession of your password AND your phone before they can access your account.
If you don’t like the idea of adding your phone number to your Google account you can also opt to work with a security key (a small physical device), but in this article I’m going to use the phone method.
If you are following me thus far you might be wondering how to enable Google 2 step verification. Glad you asked!
How to Enable Google 2 Step Verification
In order to enable Google 2 step verification, sign in to your Google account and click “Security” on the left of the welcome screen. Then scroll down to the section called “Signing in to Google” and click “2-Step verification” and follow the instructions.
Let’s see how that works in more detail. To sign in to your Google account you can use the link in the paragraph above or you can go to https://accounts.google.com. Alternatively, if you are already signed in and looking at your Gmail, you can also click the little account icon near the top right corner of your screen and then click “Manage your Google account”.

You will then land in your Google account welcome screen. Click “Security” on the left.

Then, in the next screen, scroll down to “Signing in to Google” and click “2-Step Verification” (the status should be "off", unless you already had enabled Google 2 step verification).

You’ll now see a screen that says “Protect your account with 2-Step Verification”. Click the “Get started” button to go on.

Google will now ask you to enter your password so enter it and click next.

In the next screen, enter your phone number and click next to proceed (I always choose a text message to get codes but you can also opt to receive a call).

Google will send a text message (or call) to your phone with a security code. Enter the code in the next screen and click next.

Now you should see a confirmation screen where you can simply click the “Turn on” link to enable Google 2 step verification.

Google might ask you (again) to enter your password now. Enter it and click next to proceed.

Now you will land in a final screen where it gives you an overview of what you just completed. Click the “Turn on” button in this screen to confirm that you want to enable Google 2 step verification.

That’s it! This is basically how you turn on Google 2 step verification. Now that you have completed these steps, you might feel a little disappointed about the fact that you have to pick up your phone and enter an additional security code each time you want to use your Gmail account, but don’t worry. There’s a solution for that.
Devices That Don't Need a Second Step
As mentioned above, Google 2 step verification is a way of making sure that someone else can’t access your account from their computer if they have your password. But what about your own computer? Google can add your own computer as a “device you trust” so that Google doesn’t ask for the second step in the 2 step verification whenever you access your account from your computer.

You can activate this option by checking the box next to “Don’t ask again on this device” when you sign in to your Google account.

You’ll find your computer listed under the “Your devices” subheading in your Google account overview screen.

Speaking of which, once you have enabled Google 2 step verification, you will also see a new item popping up under the “Signing in to Google” section in your Google account screen: “App passwords”.

App passwords offer a way of generating dedicated passwords for certain apps or programs (or devices) to be able to access your account. This can be useful for instance if you want to use MS Outlook to connect to your Gmail inbox. Or in the case of devices, it can offer a way to allow multifunctional printer / scanner devices (MFP’s) to be able to use your Gmail account to scan and send attachments directly via email.
The option to use Gmail app passwords only becomes available when you enable Google 2 step verification.
Google Authenticator App For 2 Step Verification
As mentioned above, you can add more options to verify it’s you besides using text messages. One of the most popular ones is by using the free Google Authenticator app on your phone.
The Google Authenticator app has a few extra advantages compared to working with text messages:
- No service costs for delivered text messages
- Works even if your phone is offline
- Can also be used to secure other accounts besides Google
In order to get started with the Google Authenticator app, go to your Google account welcome screen and click “Security” on the left. Then, under “Signing in to Google”, click on 2-Step Verification.

Enter your password and click next.
Next, under 2-Step Verification, scroll down a bit and click on the arrow next to “Authenticator app”.

Leave the screen open here and in the meanwhile, go get the Google Authenticator app on your phone from the Google Play Store or iOS App store.
Once the app is installed on your phone, return to your Google account screen on your computer and click “Set up authenticator”. A QR code will appear on your screen.

Then, on your phone again, in the Google Authenticator app, click the + sign to add your account. The Google Authenticator app will then allow you to scan the QR code on your screen to link your Google account to the app on your phone. Then click next to proceed.
You will now be asked to enter the 6 digit code that you see in the app to confirm your 2 step verification via the app.

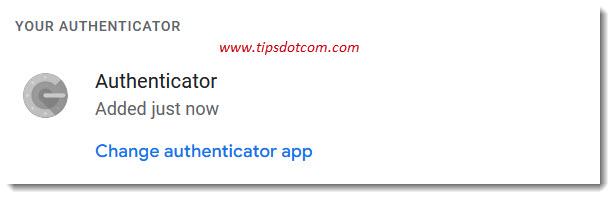
Google will now inform you that the authenticator app has been added as another means of 2 step verification for your account.
Similarly as with text message verification, you won’t be asked to enter any Google Authenticator app authentication codes as long as you access your Google account from your own computer, since it will be recognized as a “trusted device”.
Google Prompts For 2 Step Verification
Another option for Google 2 step verification that I briefly want to mention here is Google Prompts. This is yet another way of activating 2 step verification in your Google account security settings.
Basically what it does is very much the same as sending a text message to your phone, but this method requires that you need to be signed in to your Google account with your phone.
If you are signed in to your Google account with your phone, Google will then show a notification on your phone whenever someone (or you) are trying to access your account.
You will then also need to confirm via your phone that you are signing in to your account.
What With Google 2 Step Verification if I Lose my Phone?
If you lose your phone or it gets broken, you can still sign in to your Google account via your “trusted devices”, meaning your own computer. From there you can disable 2 step verification and optionally re-able it by following the steps with a new device.
As you can see, Google 2 step verification offers a lot of options to make sure that your account stays safe and that no one else can sign in to your account, even if they have your password. On top of that, it allows you to work with app passwords, which is a much sought-after technique in the world of multifunctional office devices that can scan documents as email attachments. Also for people who want to set up Microsoft Outlook with their Gmail account, app passwords offer a workaround to get the connection working.
If you've enjoyed this article or found it useful, I'd appreciate it if you'd let me know by clicking the Like (or Share) button below. Thank you!
Recent Articles
-
Allow my Organization to Manage my Device - Yay or Nay?
Oct 28, 23 11:30 AM
 Ok to allow my organization to manage my device? Here are my recommendations from an IT pro on how to deal with this. Spoiler alert: most get it wrong.
 -
Destination Path Too Long Error When Copying Files - Solved
Jul 10, 22 12:22 PM
 A destination path too long error when copying files or folders is pretty annoying. Now it doesn't have to be with this proven solution.
 -
Change The RDP Listening Port in Windows - Here's How
Jul 04, 22 08:29 AM
 You can change the RDP listening port in Windows via this setting in the registry. Don't forget to make changes in Windows Defender firewall too.
 -
Share OneDrive Files With External Users - Complete Guide
Jul 01, 22 08:39 AM
 Here's how I share OneDrive files with external users, even if they don't have a Microsoft account. Modern file sharing makes it easy.
 -
Windows 11 File History - Automated Backups
Jun 28, 22 09:44 AM
 Using Windows 11 file history to automatically backup your files. Learn about backup frequency, retention period and common mistakes.
 -
Windows 11 Device Manager - Fixing Devices That Don't Work
Jun 25, 22 12:59 PM
 Using Windows 11 device manager to fix problems with faulty devices. Updating device drivers and manually loading drivers to solve problems.
New! Comments
Have your say about what you just read! Leave me a comment in the box below.