Windows 10 Aero Snap
Has Microsoft produced a winner with Windows 10 aero snap? This new shortcut to organize multiple programs or task easily and quickly next to each other on your screen is probably one of the most unknown and underused Windows 10 features. Most people never even heard of aero snap or snap assist, even after they have been working with Windows 10 for months.
And you know what? That’s fine. You can perfectly work with Windows 10 without knowing that the feature even exists and still be productive. Until you follow along over someone’s shoulder and you see them working their magic with application windows snapping in place automatically and sharing information between programs effortlessly. Then you might start wondering whether or not this could make your life easier as well.
Windows 10 Aero Wut?
Snapping programs to the sides of the screen was one of those computer tips and tricks introduced in Windows 7. Windows 10 aero snap with snap assist now lets you snap applications to each corner, as well as to the sides. You can easily position app windows by dragging the windows title bars with your mouse or finger to certain hot spots on your screen, but there are a number of keyboard shortcuts that you can use as well. Especially in today’s modern world with large displays it can be quite handy to work with several different apps open at the same time on your screen.
That way you can keep an eye on your inbox while working on a document or surfing the internet. Or you can monitor your Facebook account while writing on your blog. The keyboard shortcuts for arranging your windows are a great way to explore the feature. No matter what application or program you’re currently working with, you can give any of the four keyboard shortcuts a whirl to see what it does.
- Windows logo key + left arrow: snap your active window to the left of your screen
- Windows logo key + right arrow: snap your active window to the right of the screen
- Windows logo key + up arrow: snap your active windows to the top of the screen
- Windows logo key + down arrow: snap your active window to the bottom of the screen
Arranging Active Windows With Windows 10 Aero Snap
Windows 10 aero snap and snap assist organizes your display in 4 regions by dividing your screen vertically in two equal areas as well as horizontally. Let’s take a look at what happens if you use the first keyboard shortcut from the list just above (Windows logo key + right arrow).
Windows 10 will respond by sending your active window to the left of your screen and your other open apps on the right of your screen.
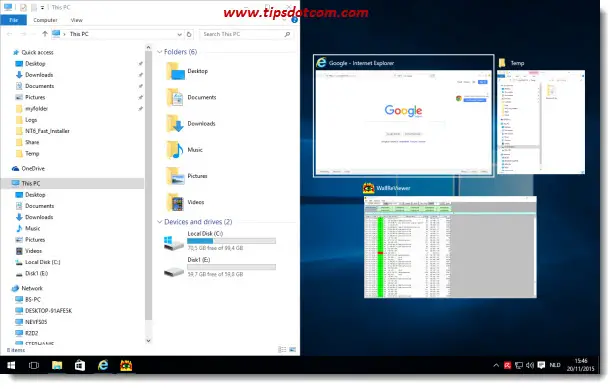
Clicking in any of the open apps on the right side of your screen will make the two apps appear on-screen, next to each other.
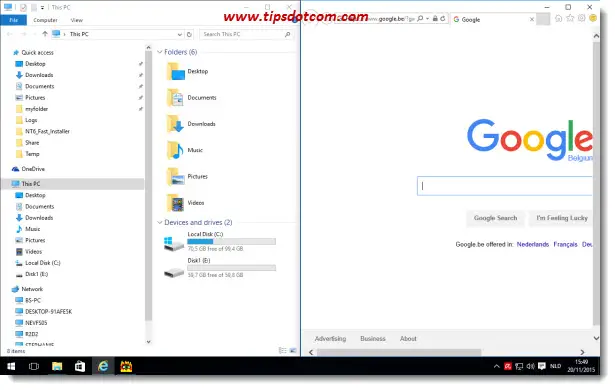
Try experimenting with the keyboard combinations Windows logo key + arrow up and arrow down as well. You’ll quickly see how your screen is divided in 4 equal ranges where your apps or programs can snap with the snap assist function.
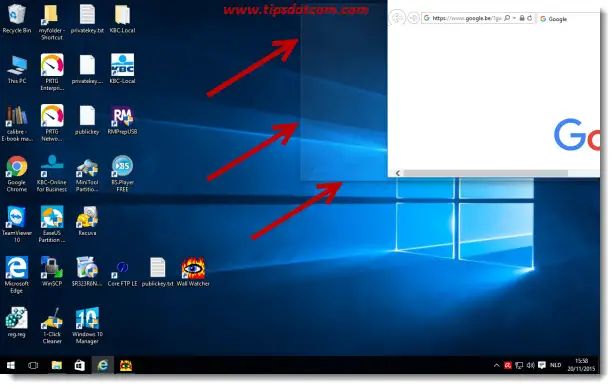
Another way of illustrating this is by clicking and dragging the Window title bars to the far right or far left edge of your screen. The 4 corners of your screen are also snap “hot spots” where you can click and drag your active windows.
The image below illustrates how Windows will “draw” a virtual box to show you where the actual borders of your current active window will be when you drag the application window to the top right corner of your screen.
Enable Or Disable Windows 10 Aero Snap
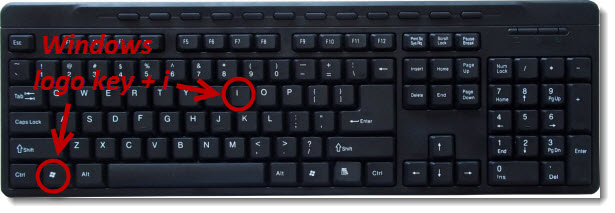
Windows 10 aero snap is enabled by default, but if you don’t like the feature, you can easily disable it. To do this, press the Windows logo key + i to open the settings screen.
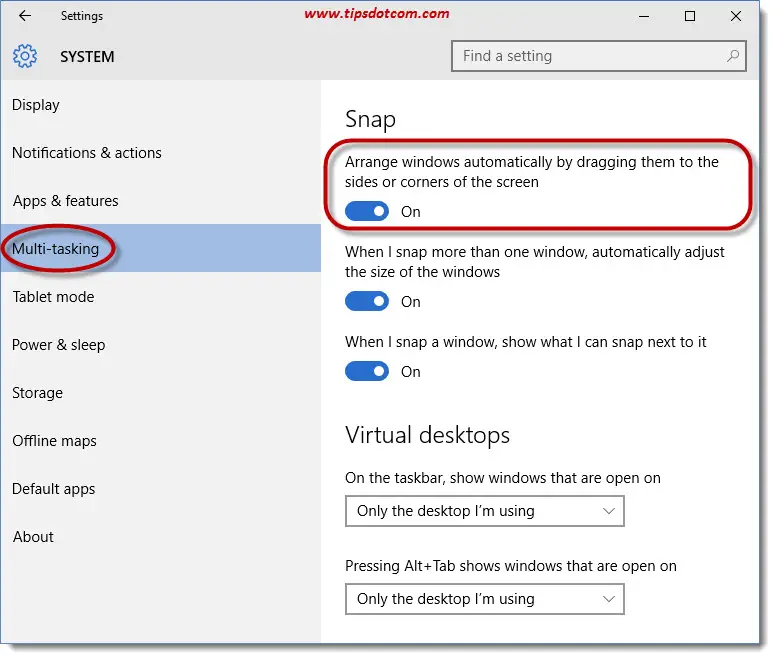
In the settings screen, select “Multi-tasking” on the left side and on the right side use the switch to disable or enable Windows 10 aero snap.
A little lower in this settings screen, you’ll also notice settings regarding Windows 10 virtual desktops, which is another fantastic way of organizing your work into separate manageable areas, each specific to the task at hand.
If you've enjoyed this article or found it useful, I'd appreciate it if you'd let me know by clicking the Like (or Share) button below. Thank you!


New! Comments
Have your say about what you just read! Leave me a comment in the box below.