Thunderbird Gmail Settings
The painfully relatable struggles with Thunderbird Gmail settings can seriously mess up your frustration tolerance (and your mail flow too). You’ve got to get it all right. Imap settings, secure connection, smtp server and what not. On top of all that, you also need to make sure that your Gmail account is set up correctly so that Thunderbird is allowed to access your mailbox.
Mozilla Thunderbird knows the importance of today’s security standards and you better be ready to meet its needs or it may decide to go rogue on you and not deliver your email messages.
That’s where this guide comes in.
How to Set up Mozilla Thunderbird Gmail Settings Correctly
Luckily, today’s version of Mozilla Thunderbird has built-in functionality to make the integration with Gmail a lot easier than it used to be. Technically, you don’t even need to “Enable imap” in your Gmail account for your Thunderbird Gmail settings to work.
Let’s take a look at how this works.
For the automated setup to work, it's best that you sign in to your Gmail account with your web browser first, before you do anything else in Thunderbird. That way, Thunderbird will use your existing browser session to configure access to your Gmail account. So go ahead and go to the Gmail sign in page and sign in with your Gmail address and password.
Now you are ready to start working on your Thunderbird Gmail settings.
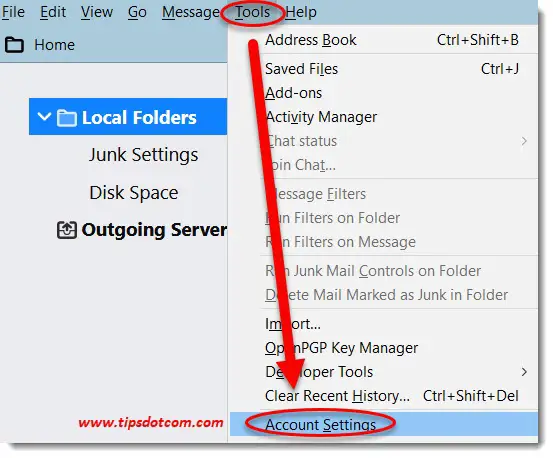
If you start Thunderbird for the very first time, it will automatically ask you to set up a mail account so you can follow the instructions below. If you’ve already worked with Thunderbird and need to add your Gmail account, click the “Tools” menu and select “Account settings”.
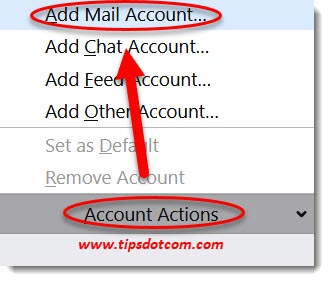
In the Thunderbird account settings screen, click “Account actions” and select “Add Mail Account”.
That will open up the same email account setup screen that you will get when you start Thunderbird for the first time:
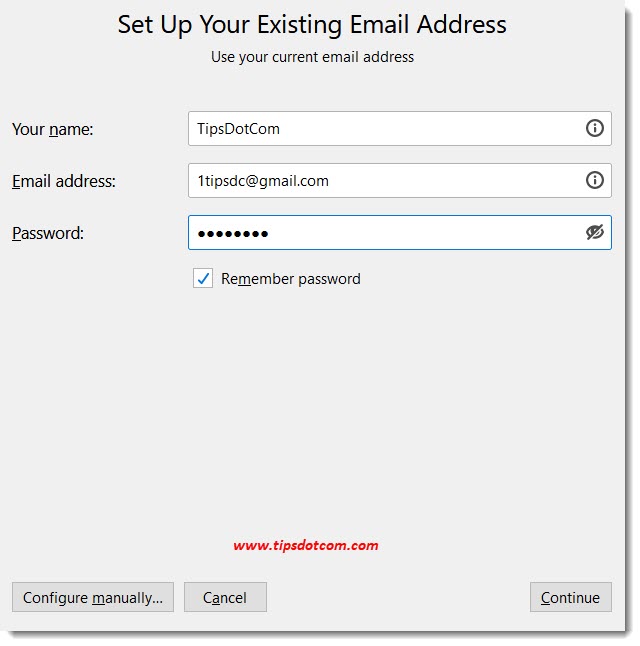
Enter your full name, your Gmail email address and your password and click continue.
Your Mozilla Thunderbird Gmail settings should automatically be configured correctly and show “imap.gmail.com ssl” and “smtp.gmail.com ssl” in the next window.
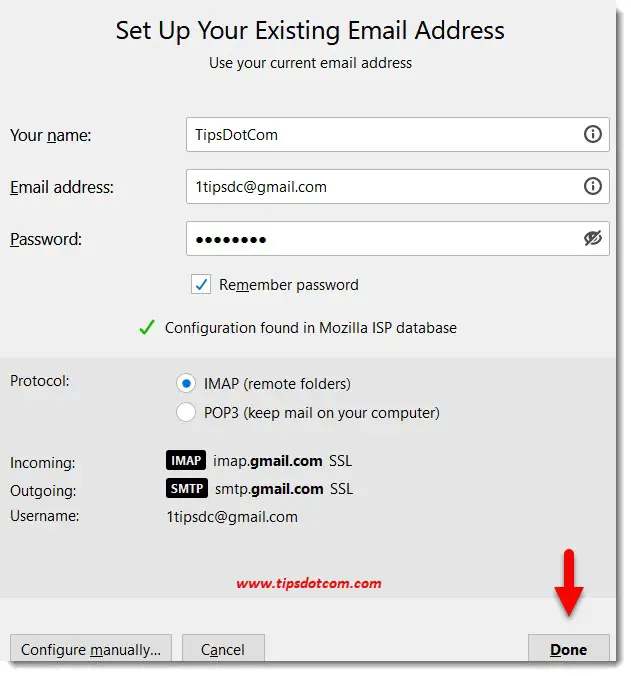
Click “done” to continue.
Thunderbird will now use your existing browser session (provided that you are indeed signed in to your Gmail account in a browser session) and come up with a Google account sign in screen like this (your Gmail address should already be prefilled, if not, enter your Gmail address here):
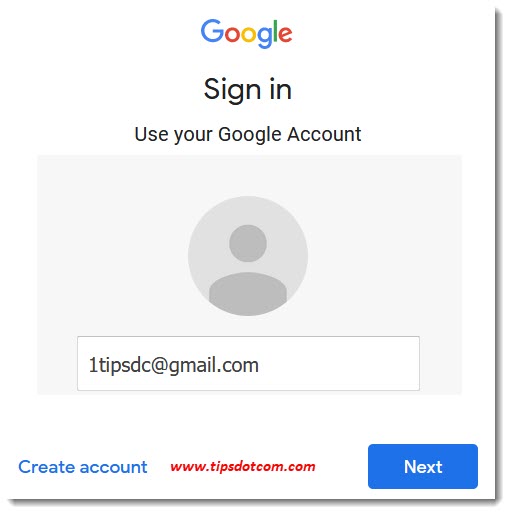
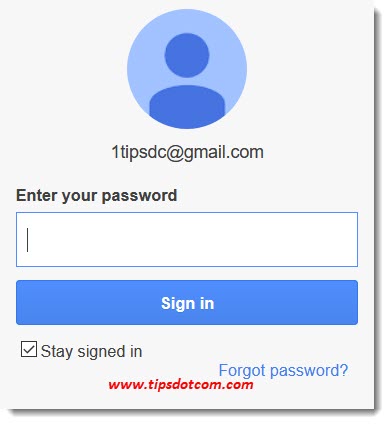
Click the “next” button to proceed. You will now be asked to enter your password to allow Thunderbird to access your Gmail account. Enter your Gmail password and click “Sign in”.
Now you will get a confirmation window, where it is laid out that Mozilla Thunderbird wants access to your account.
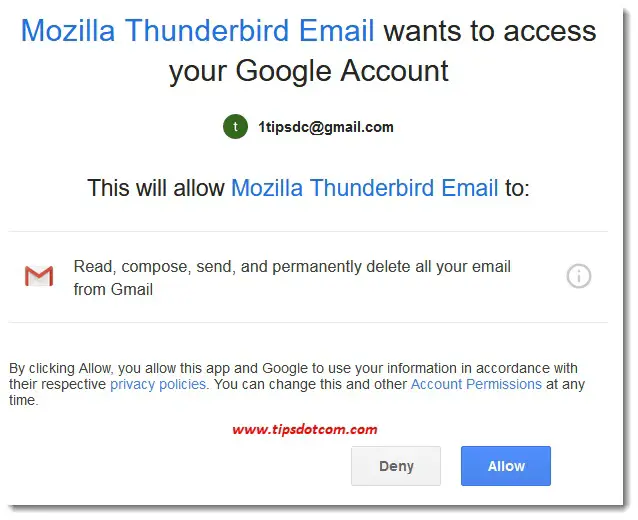
If you click allow, your Thunderbird Gmail settings are configured. Congratulations, you can now read (and send) Gmail messages in Thunderbird!
Third-Party Apps in Gmail Settings
With the steps above, you are now completely ready to start using Thunderbird with your Gmail account. There is nothing more you need to do. For the sake of completeness, I want to add a little extra word here though.
By configuring Thunderbird Gmail settings like that, you have now just allowed Thunderbird to access your Gmail account.
You can find evidence of that by checking in your Gmail account. If you open a web browser and go to the sign in page for your Gmail account, you can check that out.
Once signed in, click the settings gear icon near the top right corner of your screen and select “See all settings”.
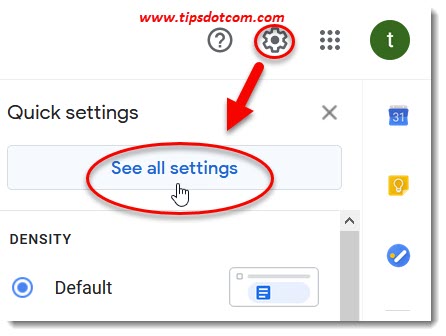
In your Gmail settings screen, click on “Accounts and Import” and then click “Other Google account settings”.

Then click “Security”.
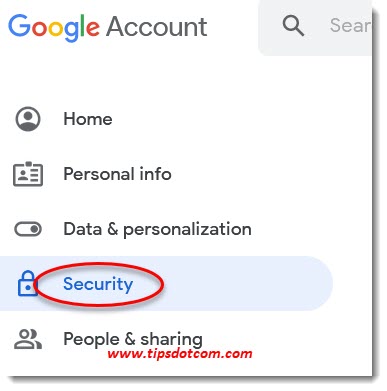
In the right side of the screen, scroll down to “Third-party apps with account-access”.
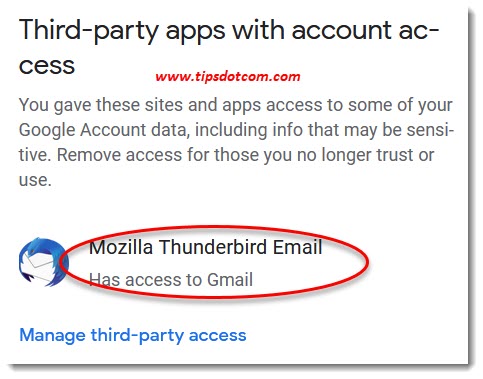
Here you will see Mozilla Thunderbird Email as an app that has access to your Gmail account. Should you ever want to revoke that access, then you can click the “Manage third-party access” link in this screen (see image just above).
Then it will show Mozilla Thunderbird Email and “Has access to Gmail”.

You can click on “Mozilla Thunderbird Email” you’ll get an overview of the access rights that Thunderbird has in your Gmail account.
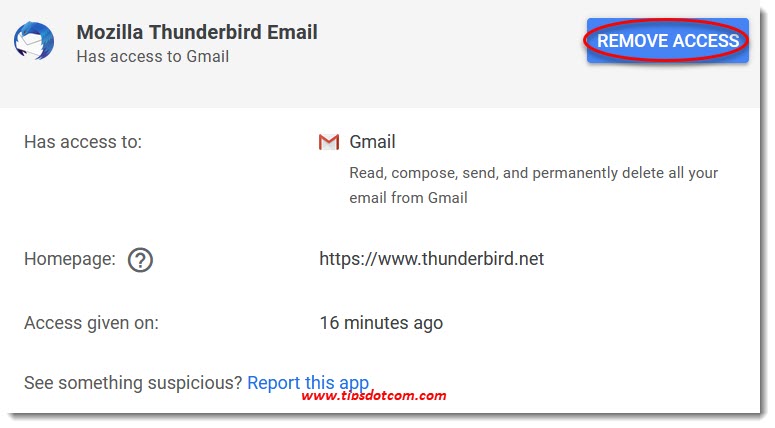
Here you can use the “Remove access” button should you ever decide that you no longer want Thunderbird to have access to your Gmail account.
With this I hope to have given at least some guidance on how to configure Thunderbird Gmail settings and how to use Mozilla Thunderbird with Gmail.
Related: Move Thunderbird to a new computer.
If you've enjoyed this article or found it useful, I'd appreciate it if you'd let me know by clicking the Like (or Share) button below. Thank you!


New! Comments
Have your say about what you just read! Leave me a comment in the box below.