How to Print Only Selected Cells in Google Sheets
In this article I show how to print only selected cells in Google Sheets. If you’re printing your Google Sheets document and you specify no print area, by default it will print the whole thing, which may not always be what you need.
Instead, you may want to select an area in your Google Sheets document and print only the part that contains your selected cells. It's more or less the same thing as setting a print area in Google Sheets. Luckily that’s easy to accomplish. I’ll show you how.
How to Print Only Selected Cells in Google Sheets in Easy Steps
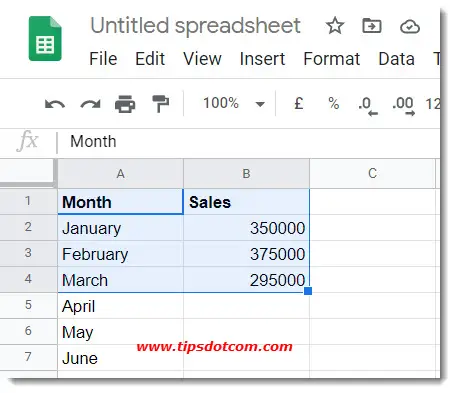
In the image below I have selected cells A1 to B4 to demonstrate how to print only selected cells in Google Sheets. That’s the selection I want to print, no other information of the Google sheet should be printed. So let's see how to set the print area in Google Sheets.
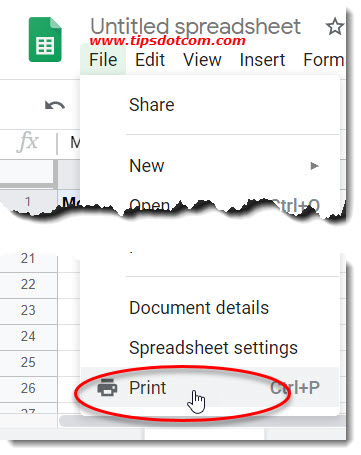
After you have selected the cells that you want to include on your printed document, you select file -> print from the menu, like illustrated in the image below (I’ve cut out part of the print menu to make the image somewhat more compact). Alternatively, you can press CTRL + p on your keyboard to call out the Google Sheets print dialog.
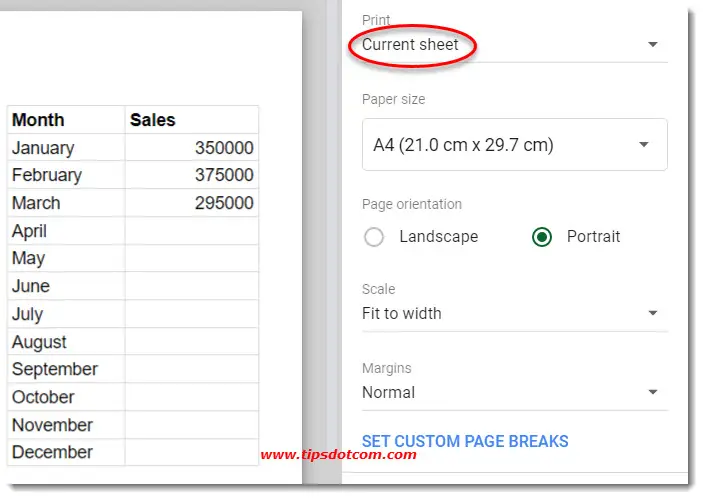
Google Sheets will now open the print dialog box and initially you’ll see that all of the data in the sheet appears on the preview image. That's not what we want. You’ll also notice that the print selection is set to “current sheet” (see image below).
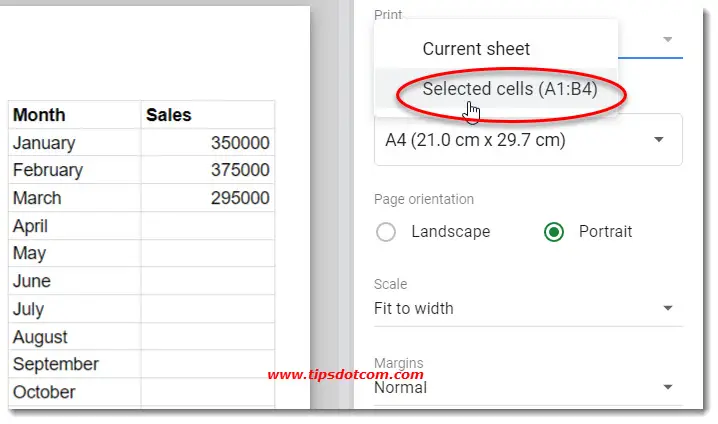
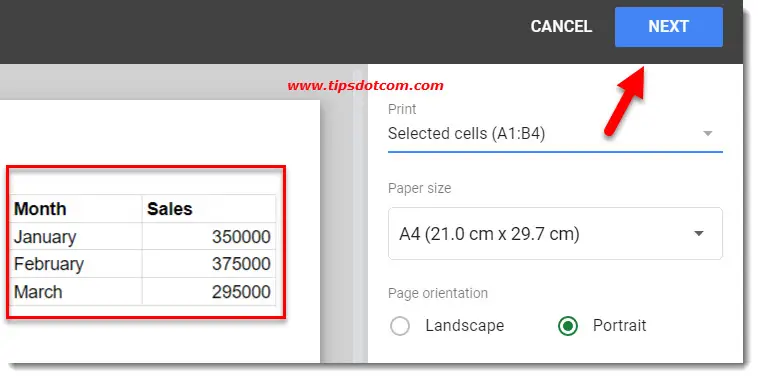
Changing this print selection dropdown list to “Selected cells” is how to print only selected cells in Google Sheets. You’ll notice that Google Sheets also immediately adds your selected range (A1:B4 in this example) in brackets behind the “Selected cells” setting.
As soon as you click “Selected cells”, you’ll also notice that Google Sheets automatically changes the print preview and that only the information in your selection is displayed.
From there, click next to continue printing your document.
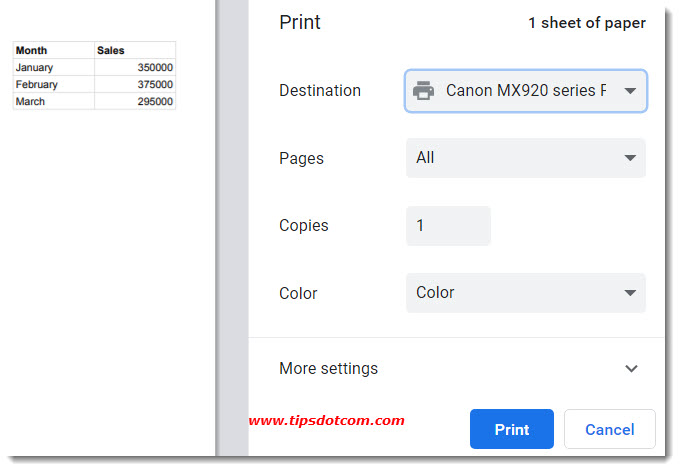
Now Google Sheets will show you the final print dialog window where you have another preview of what will be printed (left hand side in the image below) and where you can select your printer or change more settings (like for instance the setting to print on both sides of the page if your printer supports it). Alternatively you can select to save the output as a pdf document. Click print to continue and produce your printed (or pdf) document.
Your document will now be printed with only the information in the cells that you had selected prior to launching the print command.
This is how to print only selected cells in Google Sheets, I hope the instructions were clear and have helped you to print only the parts you needed in your Google Sheets document.
If you've enjoyed this article or found it useful, I'd appreciate it if you'd let me know by clicking the Like (or Share) button below. Thank you!


New! Comments
Have your say about what you just read! Leave me a comment in the box below.