How to Create a Windows 11 Sleep Mode Shortcut?
Many laptop users are trying to figure out how to create a Windows 11 sleep mode shortcut. A shortcut like that can be very convenient to save battery time or simply to activate sleep mode with the click of the mouse. Not only that but if you manage to squeeze more usage out of a single battery charge cycle, your overall battery life time will also be longer.
Windows 11 sleep mode isn’t that much different from sleep mode in Windows 10 so with that in mind, let’s take a look at how you can create a sleep mode shortcut in Windows 11.
How to Create a Windows 11 Sleep Mode Shortcut (+Sleep Mode Shortcut Key)
Step 1: Create a new desktop sleep shortcut
In this first step, we’re going to create a new Windows 11 desktop icon that will serve as our sleep mode shortcut.
To do so, right-click an empty spot on your Windows 11 desktop and select “New shortcut”.
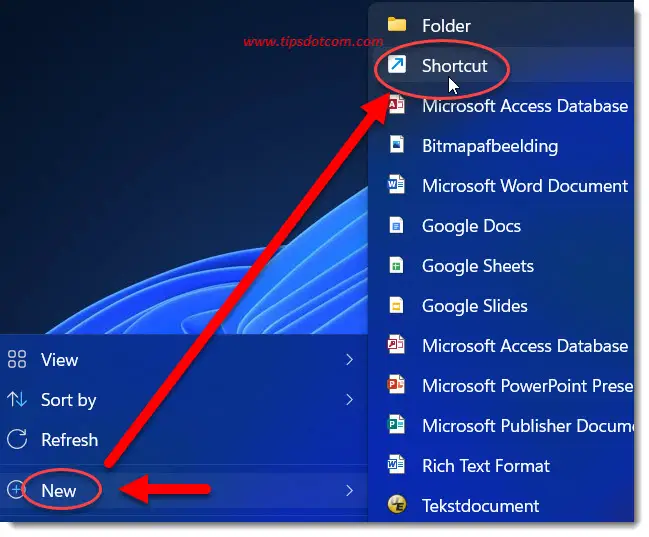
Windows will now launch the new shortcut wizard and ask you “What item would you like to create a new shortcut for?”
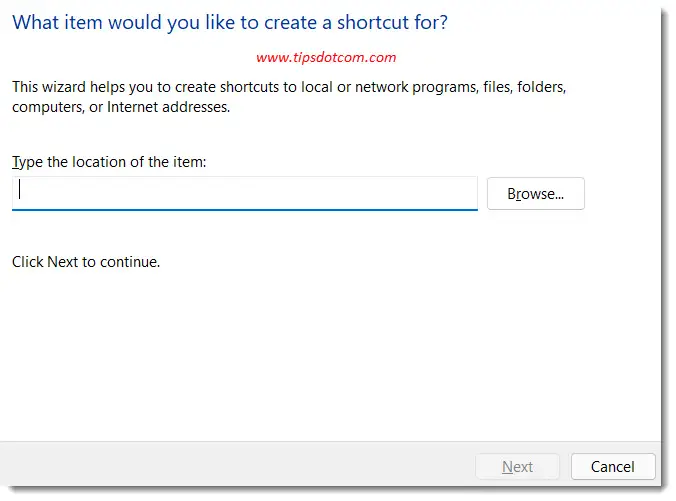
As you can see in the image above, the new shortcut wizard prompts you to enter the location of the item that you want to create a shortcut for.
Type the entry exactly as you see in the line below here (you can copy and paste the text to avoid mistakes).
C:\Windows\System32\rundll32.exe powrprof.dll,SetSuspendState
With the text entered exactly as shown here, click next to continue.
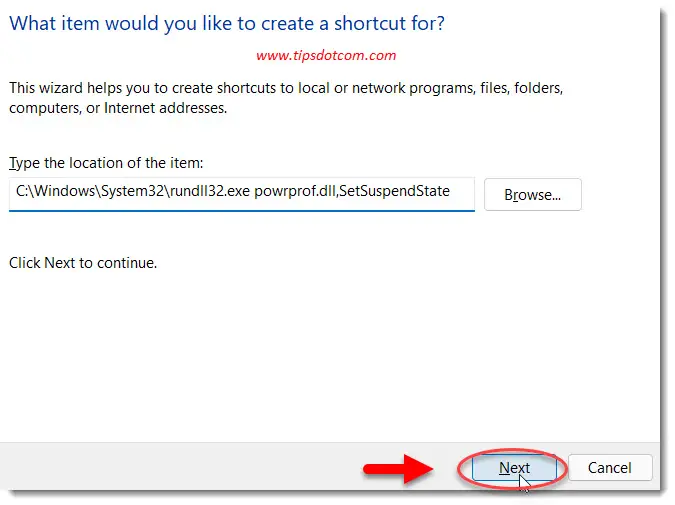
With the text entered exactly as shown here, click next to continue.
The wizard will now ask you to enter a name for the new shortcut. Here you can pick any name you like. Then click finish to proceed.
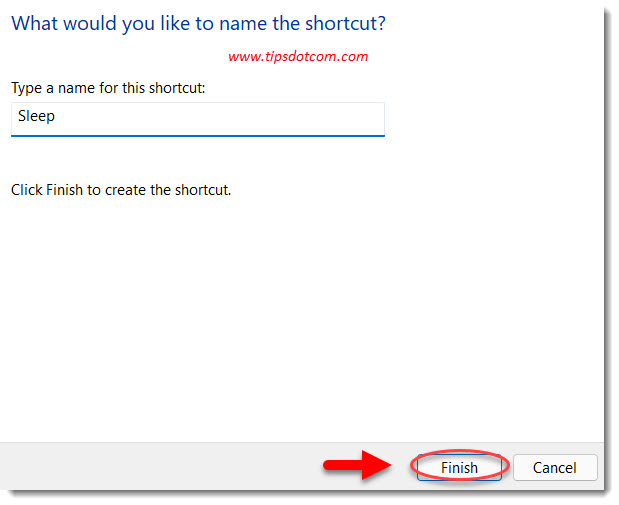
Now your new desktop icon is ready and will be created on your Windows 11 desktop.
It will be functional so when you double-click it, your computer will go into sleep mode.

One thing that I personally find irritating is that the new sleep shortcut looks a bit plain. That can be helped though, so let’s see how we can make it look better.
Step 2: Select a proper icon for the sleep shortcut
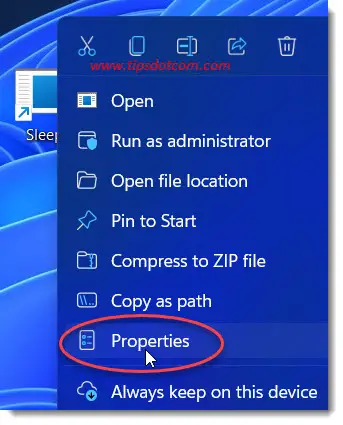
In order to select a better icon for your new Windows 11 sleep shortcut, right-click the shortcut and select “Properties”.
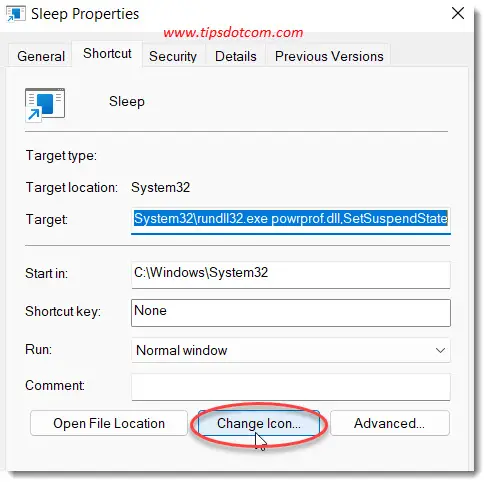
In the properties window, click the button that says “Change icon”.
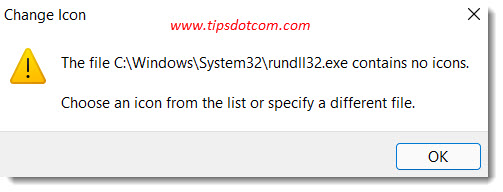
Windows will then show a warning that the icon doesn’t contain any icons, but that’s ok. Simply click ok to proceed.
Now you’ll get a list of different icons that you can select for your Windows 11 sleep shortcut. Pick one that you like and click ok.
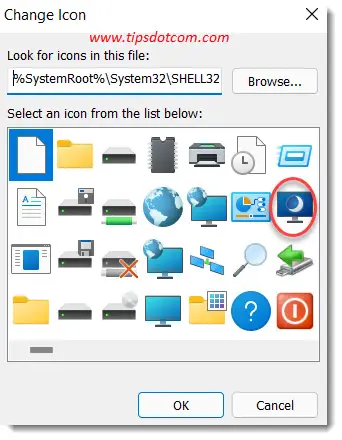
The icon will become visible in the shortcut properties window. Click ok to confirm.
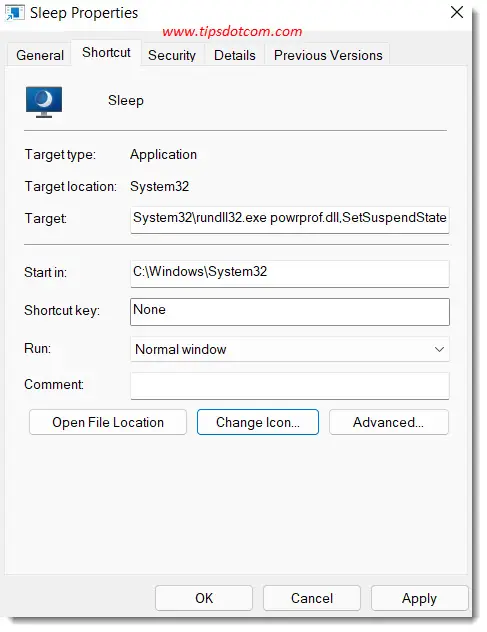
Now your sleep desktop shortcut looks better and you can continue to the next step.
Step 3: Pin the new Windows 11 sleep mode shortcut to your taskbar
To pin the sleep mode shortcut to your taskbar, right-click the icon and select “Show more options”.
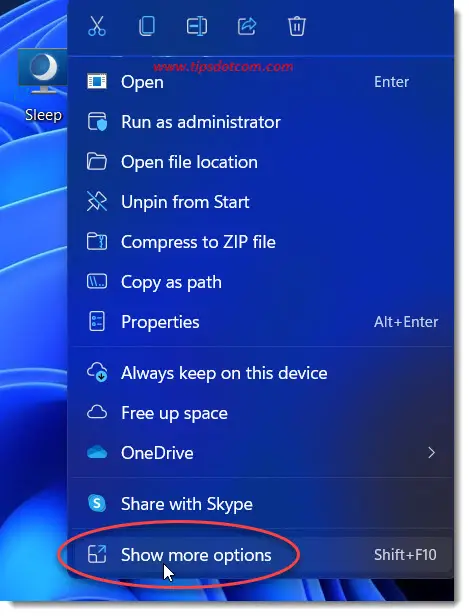
Then select “Pin to taskbar” to pin your sleep mode shortcut to your taskbar.
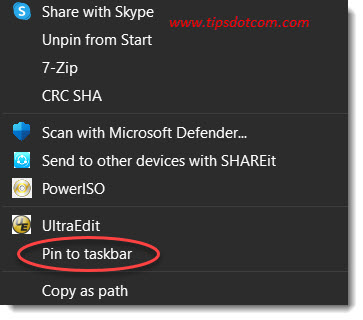
With your Windows 11 sleep mode shortcut sitting on your taskbar you can literally put your computer into sleep mode with a single click of the mouse.

Step 4: Check if the new sleep mode shortcut invokes sleep mode
In some cases the sleep mode shortcut will cause the computer to hibernate rather than go into sleep mode. Hibernation is not the same as sleep mode, since hibernation will cause the computer to save its current state (open programs, documents etc) to the hard drive and then shut down. That means that re-activating your computer from hibernation mode will take longer because it will have to re-load everything that was saved into hibernation.
Sleep mode, on the other hand, just puts the computer in a low-energy state keeping everything that you were working on ready for when you resume working. When your computer is in sleep mode, it will wake up on a keystroke or mouse click. If your computer is in hibernation mode, you have to press the power button to start it up.
It seems to be the case that sometimes the sleep mode shortcut will invoke hibernation rather than sleep mode (this seems to be the case when hibernation is turned ON in your computer settings).
If that’s the case with your computer, you can change that by disabling hibernate. To do so, open an elevated command prompt (If you’re not sure how to do that, I have an article that explains how to open an elevated command prompt in detail).
In the elevated command prompt enter the following command:
powercfg -hibernate off
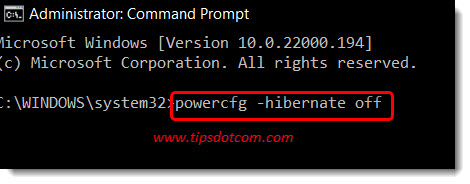
When the command completes, you can simply close the command prompt window and you should be good.
Now that hibernate is turned OFF, your Windows 11 sleep mode shortcut should work just fine and should put the computer into sleep mode.
Windows 11 Still Going to Hibernate Rather Than Sleep
In some cases the computer will still go to hibernation mode with the sleep mode shortcut described in this article, even if you’ve entered the “powercfg -hibernate off” command. That can be the case with certain BIOS settings in certain models of motherboards. Luckily for those cases, there’s yet another option that you can try to create a Windows 11 sleep mode shortcut: the psshutdown command.
The psshutdown command is not known in a standard Windows 11 environment, but can be downloaded as a part of the Sysinternals utilities. Sysinternals is a set of system utilities that are supported by Microsoft.
You can download a copy of the Sysinternal tools here.
Once you’ve downloaded your copy of the Sysinternal tools, you’ll have to extract the files because the download comes as a zip archive file.
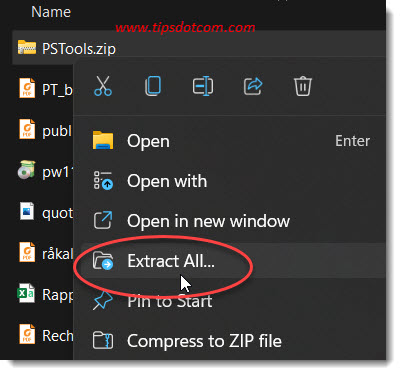
Right-click your downloaded pstools.zip file and click “Extract All”.
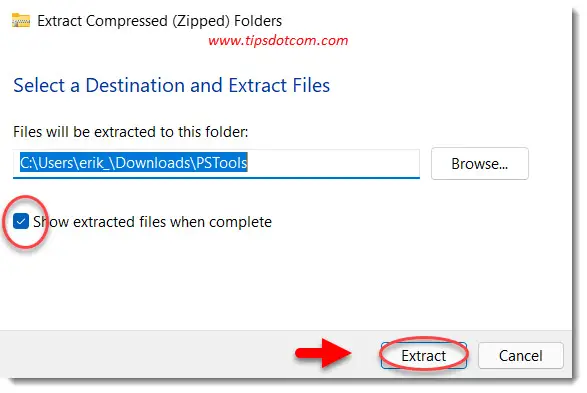
Windows will then ask you to select a destination for the extracted files. You can leave the suggested folder or change it according to your preferences, and if you leave the box next to “Show extracted files when complete” checked, you will automatically land in the extracted folder when complete.
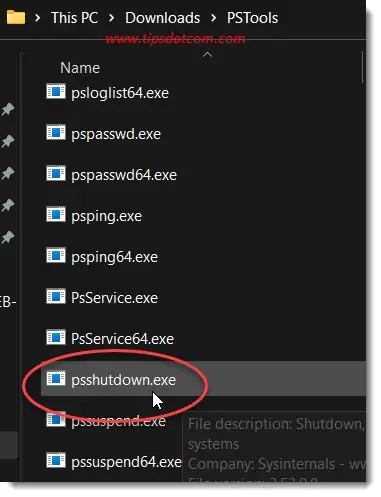
Now you’ll have the extracted pstools files available and among them you will find psshutdown, which is the one that we can use to create a Windows 11 sleep mode shortcut.
The next step is going to be to create a shortcut on your desktop. To do so, right-click the psshutdown file and select “Show more options”.
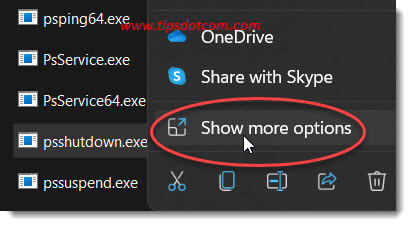
Then select “Send to -> Desktop (create shortcut)”.

You’ll now have a shortcut to the psshutdown utility on your desktop.

But we’re not done yet. We need to make a slight modification to the shortcut in order for it to make the computer go to sleep mode when activated.
To do so, right-click the shortcut and select “Properties”.
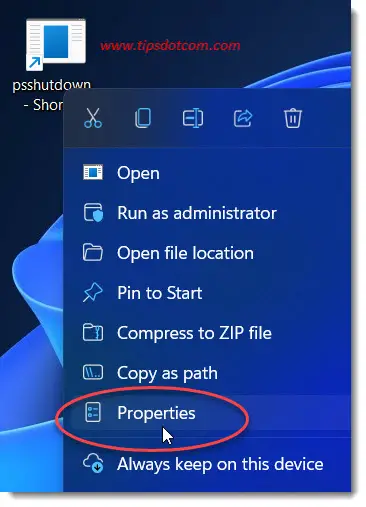
Now in the properties screen, click the “Target” field and position the cursor all the way at the end of the entry.
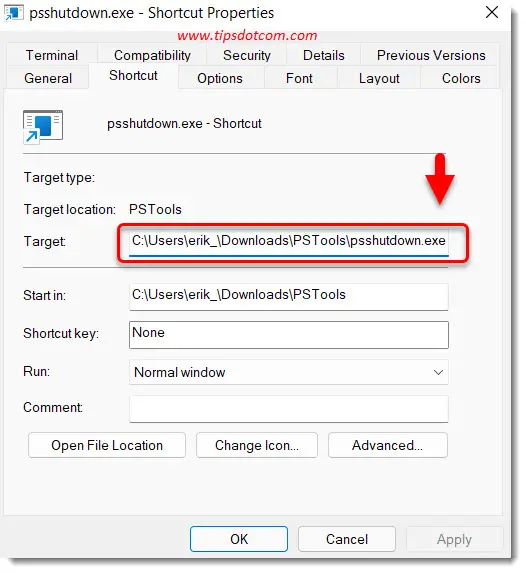
Add “ -d -t 0” (without the quotes - last character is a zero) at the end of the command, making sure that you include a space between psshutdown.exe and -d -t 0.
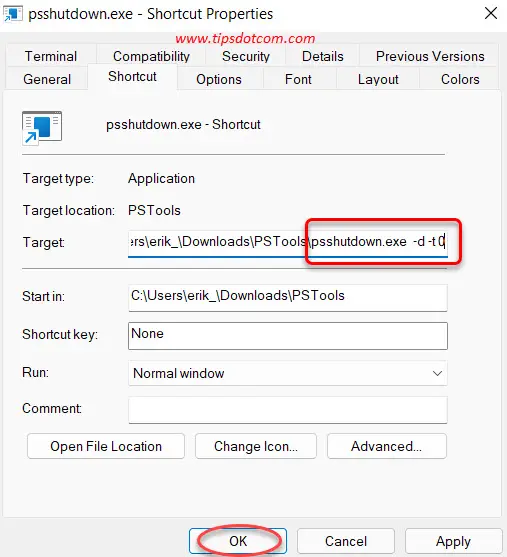
Click ok to confirm and now your Windows 11 sleep mode shortcut is ready. If you prefer to have it on your taskbar for easy access, you can pin it to the taskbar in a similar fashion as described earlier on in this article.
How Can I Create a Windows 11 Sleep Mode Keyboard Shortcut?
Some people prefer to have a keyboard shortcut to put the computer into sleep mode rather than an icon to click on. While some manufacturers offer a pre-configured sleep mode keyboard shortcut (usually indicated with a little moon icon), you can also create your own keyboard shortcut via the properties of the desktop icon that you just created via the steps described above.
To do that, right-click the icon and select “Properties”.
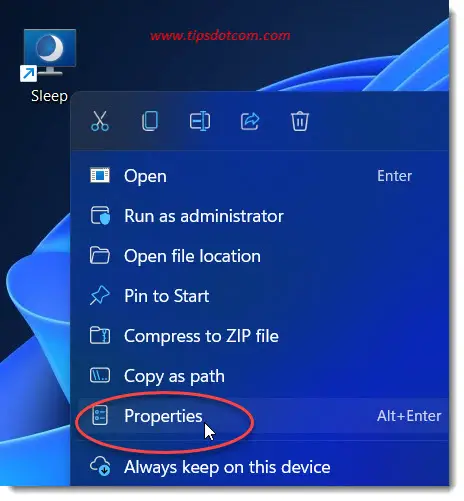
Then, click in the “Shortcut key” field, where it says “None”.
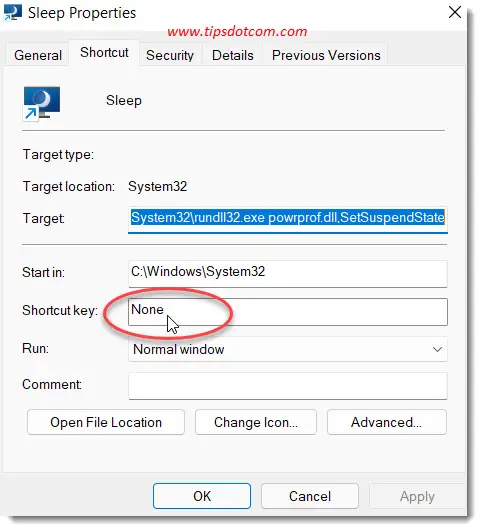
Now, with the shortcut key field selected, press any keyboard shortcut combination that you would like to assign to your sleep mode icon. In this example I’ve chosen CTRL + F5.
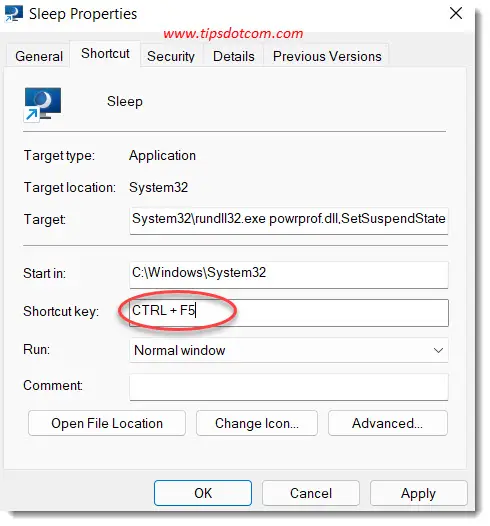
Now click ok to confirm your settings. Now you have a Windows 11 sleep mode keyboard shortcut to put your computer into sleep mode.
Congratulations, you’ve made it through the entire article. It’s become a rather lengthy one, but I hope that it has helped you to create a Windows 11 sleep mode shortcut. Please consider giving it a like or leaving a short comment below, thank you!
If you've enjoyed this article or found it useful, I'd appreciate it if you'd let me know by clicking the Like (or Share) button below. Thank you!


New! Comments
Have your say about what you just read! Leave me a comment in the box below.