Automatically Run an Elevated Task at Startup in Windows 10 (or 11)
In order to automatically run an elevated task at startup in Windows requires a bit more configuration than simply slamming the task in Windows’ startup apps. To auto start programs as administrator, you’re going to have to get a little creative and that’s exactly what I cover in this article.
The reason why you can’t just auto run programs with administrative privileges at startup has to do with security. By default, Windows doesn’t allow elevated tasks at startup. When running tasks or commands as administrator, Windows will throw a UAC prompt (User Account Control) prompt that you’ll have to confirm if you want the task to run. Luckily you can circumvent this.
There is however one prerequisite: you do have to be signed in as an administrator though in order to be able to configure a task to autorun as administrator at startup. Ok then, but how is it done?
How to Automatically Run an Elevated Task at Startup - Windows 10 or Windows 11
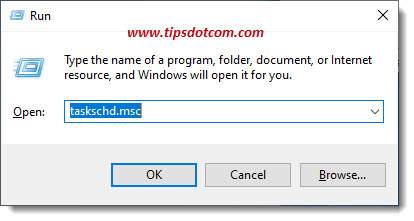
Step 1: To be able to automatically run an elevated task at startup, you need to work with Task Scheduler. So press the Windows logo key + r on your keyboard to open the run box.

Step 2: In the run box, type “taskschd.msc” (without the quotes) and click ok to open up Task Scheduler.
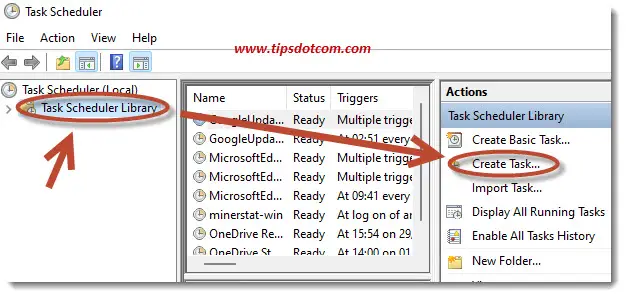
Step 3: Now, with Task Scheduler open, click on “Task Scheduler Library” and then click “Create Task”. This will open up the “Create Task” window.
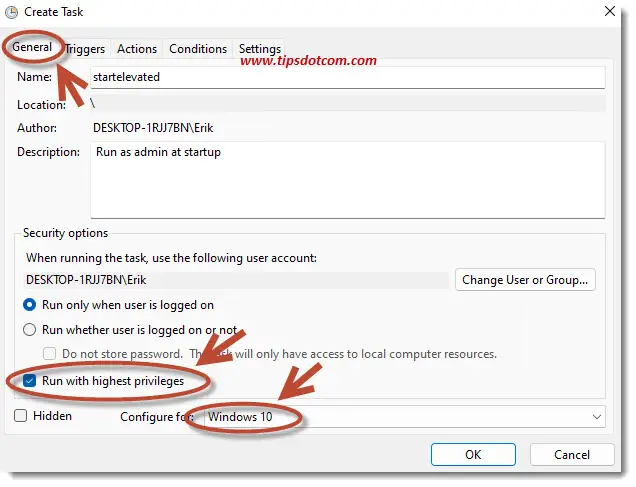
Step 4: In the “Create Task” window, on the “General” tab, enter a name for your task, check the box next to “Run with highest privileges” and select “Windows 10” from the “Configure for” dropdown list (even if you’re on Windows 11). Carefully note the name you enter for the task (you’ll need it in the next steps).
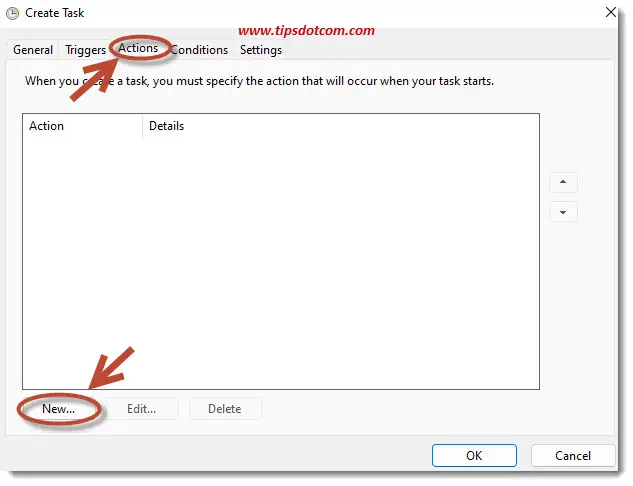
Step 5: Now switch to the “Actions” tab and click “New”.
Then enter “cmd.exe” (without the quotes) in the “Program/script” field. In the “Add arguments (optional)” field, enter the following, with the name of your task that you created in step 4 plus the full path to the program that you want to run. For example:
/c start "startelevated" "C:\Users\Erik\Downloads\t-rex-0.25.12-win\eth-ethermine.bat"
Where “startelevated” is the name of the task you created in the previous step and the rest is the full path to the command to run.
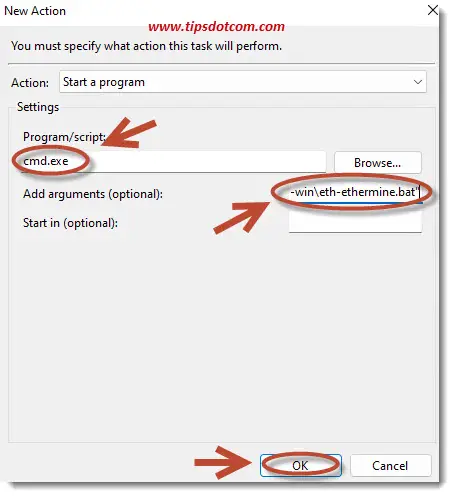
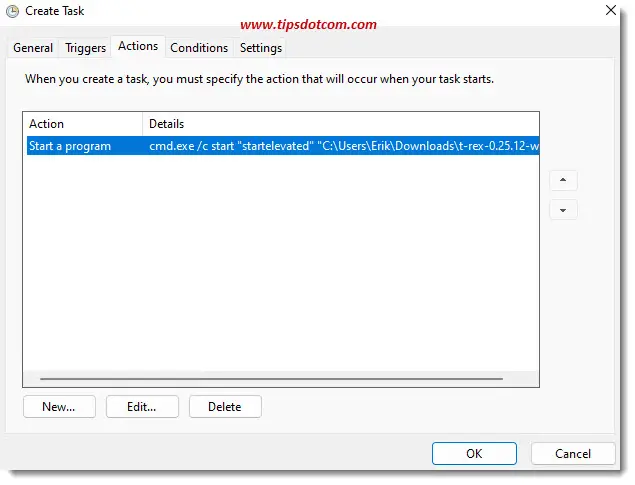
Step 6: Click ok to confirm your settings. You will then see your newly created task.
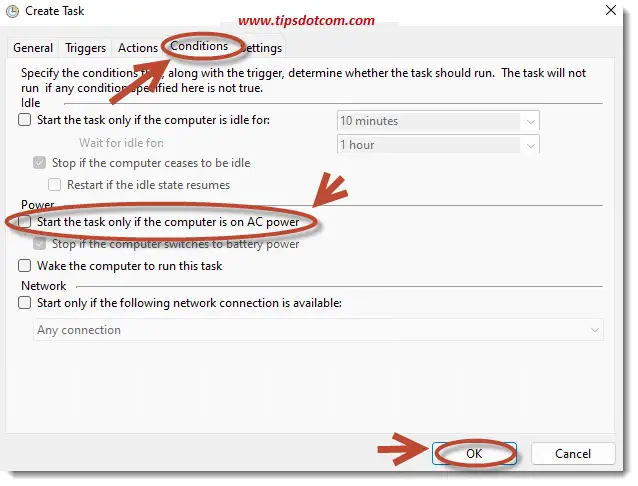
Step 7: Switch to the “Conditions” tab and deselect the option to “Start the task only if the computer is on AC power”. Then click ok.
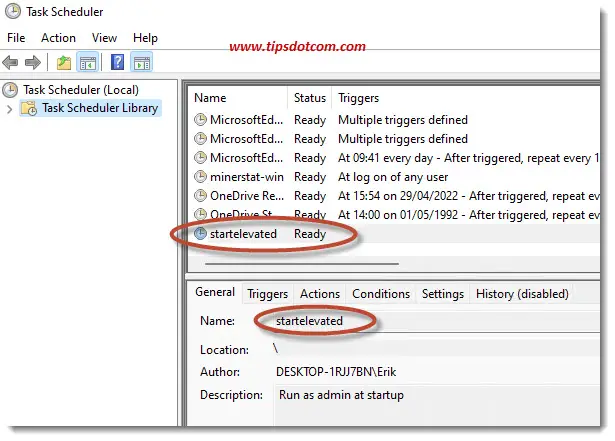
Step 8: You will now see your new task in your Task Scheduler Library. Close the Task Scheduler window.
Step 9: Now you need to create a shortcut to be able to launch the new tasks. Later on you will automatically run an elevated task at startup and make sure that it’s going to be this task. Right click on your desktop and select “New”, then select “Shortcut”.
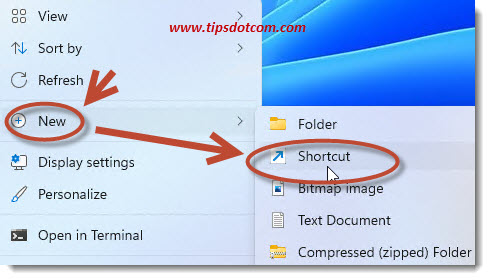
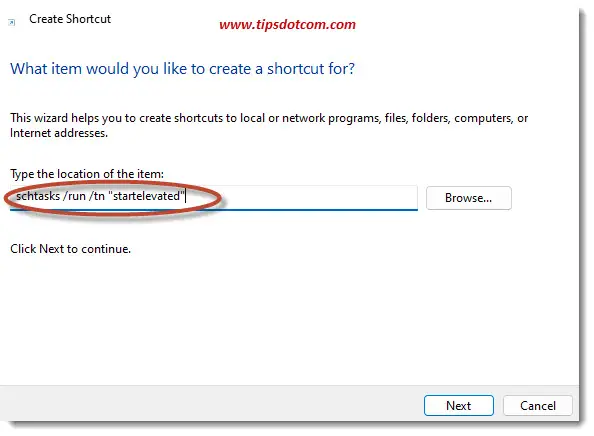
Step 10: Enter schtasks /run /tn "yourtaskname", where the part between the quotes must be the task name you created in step 4 (I used "startelevated" here). Then click next.
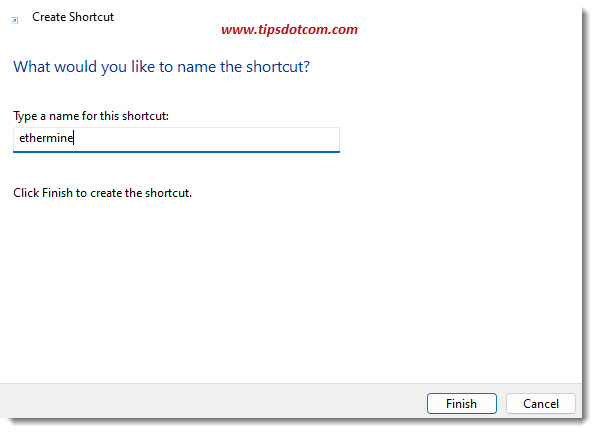
Step 11: Enter a name for the shortcut and click “Finish”.
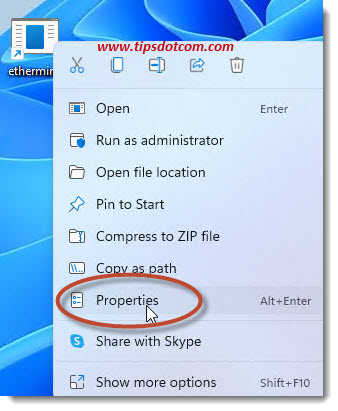
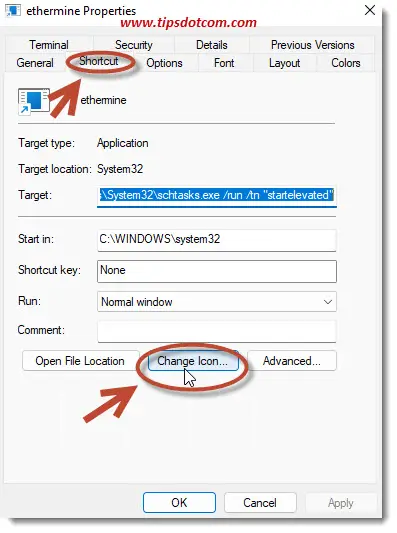
Step 12: This step and steps 13, 14, 15 and 16 are optional, but they will make sure your new shortcut has an icon that makes a little more sense. Right click your new desktop shortcut and select “Properties”
Step 13: On the “Shortcut” tab, click the “Change icon” button.
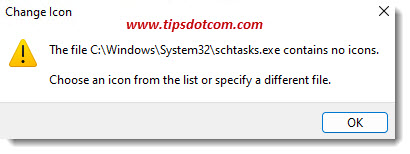
Step 14: If you see a message that the file contains no icons, click ok.
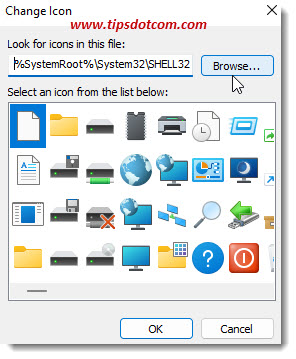
Step 15: Click the browse button ...

... and select the file that you want configured to automatically run an elevated task at startup.
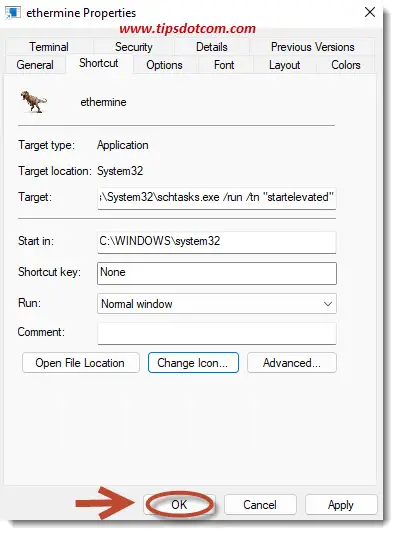
Step 16: Click ok to close the shortcut properties dialog box.
Step 17: Almost there. Now that your icon for the task that you want set up to automatically run an elevated task at startup is ready, the only thing left to do is make sure that it automatically launches at startup. To do this, launch File Explorer and type “shell:startup” (without the quotes) in the address bar end press ENTER to go to the Windows startup folder.
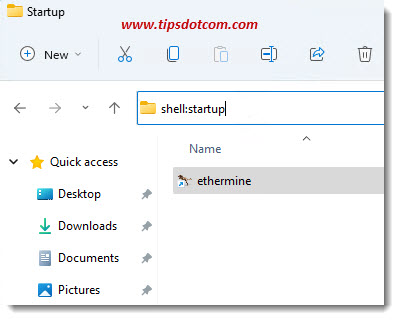
Step 18: Now add the icon you created to run an elevated task at startup to the Windows startup folder and you are ready.
This concludes how to automatically run an elevated task at startup. All that's left to do now is close any open windows and restart your computer. It might take a while after the reboot has completed, but your new task should now automatically start running with administrator privileges.
That were quite a few steps to pull it off, but I hope this article was helpful in setting up your task to auto run at startup. If it was helpful, I'd really appreciate it if you could click the like button below or leave a short comment, thank you!
If you've enjoyed this article or found it useful, I'd appreciate it if you'd let me know by clicking the Like (or Share) button below. Thank you!


New! Comments
Have your say about what you just read! Leave me a comment in the box below.