Customize Windows 10 Start Menu
You can easily customize Windows 10 start menu items with a few clicks of your mouse. Which is a good thing, since you will probably want to have your most used programs and apps nearby when you click the Windows 10 start button.
This is what a typical Windows 10 start menu would look like in a normal Windows 10 setup:
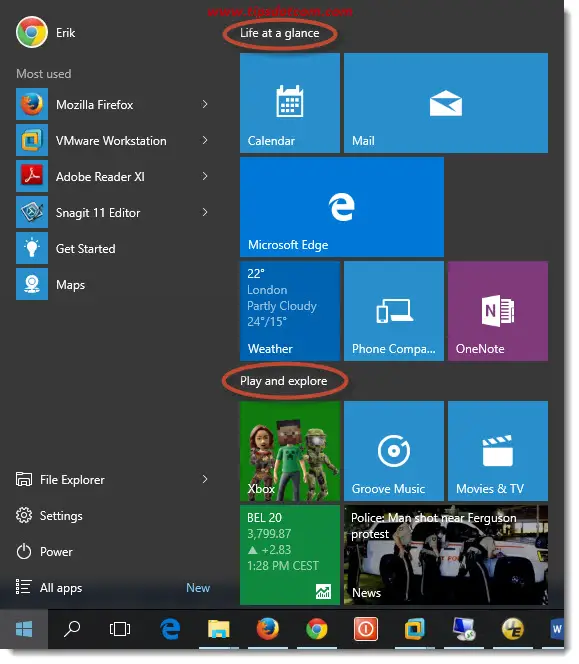
Notice the “Life at a glance” and “Play and explore” subheadings in the right part of the menu. These are the two most prominently placed app groups that Windows 10 puts there by default. Microsoft has carefully considered the items to populate the “Life at a glance” and “Play and explore” sections, but I wouldn’t be surprised if you have some other ideas about programs you’d like to add to your Windows 10 start menu.
Maybe you even tried to right-click an empty spot in your start menu in order to bring up a menu with options to add programs to the Windows 10 start menu. The problem is that the start menu may have empty spaces that look like you could right-click on them to add programs, but you can’t.
Customize Windows 10 Start Menu Programs
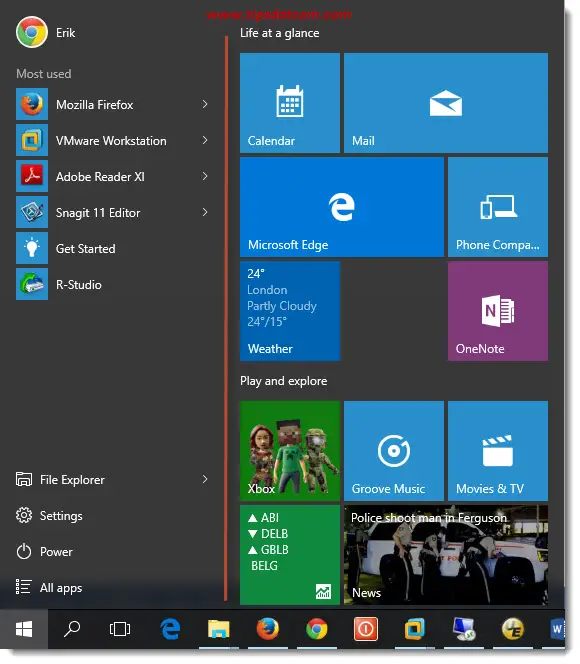
To customize Windows 10 start menu programs, you need to notice the distinction between the right and the left side in the start menu. The right side is where the larger icons or “tiles” live, whereas the left side offers you a list of most used programs and shortcuts to your File Explorer, computer settings, power actions and installed programs. This is illustrated in the image below by the vertical red line.
Before you add or remove programs on your Windows 10 start menu, please do yourself a favor and check for the presence of the program in your start menu. This may sound trivial, but you wouldn’t be the first to try and add a program to the Windows 10 start menu when it’s already there. That’s because you may need to do some scrolling to see all the programs on the menu.
When you click your Windows 10 start button, it may not be apparent that you can scroll, but if you hover with your mouse over the right side of the menu, the vertical scroll bar may become visible.
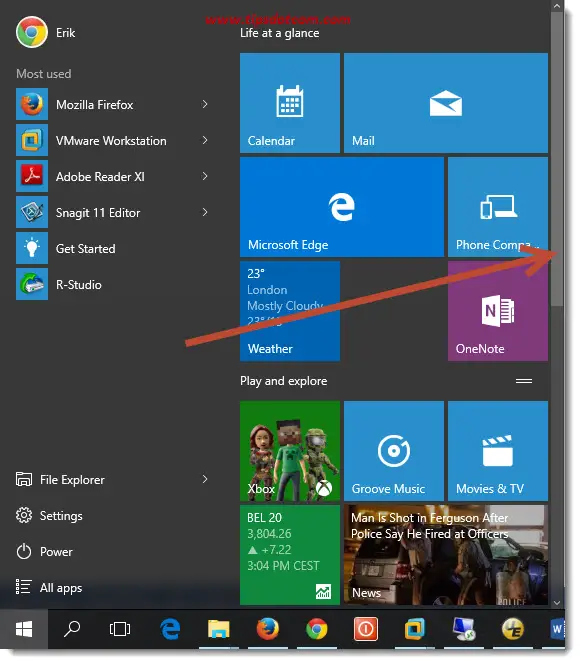
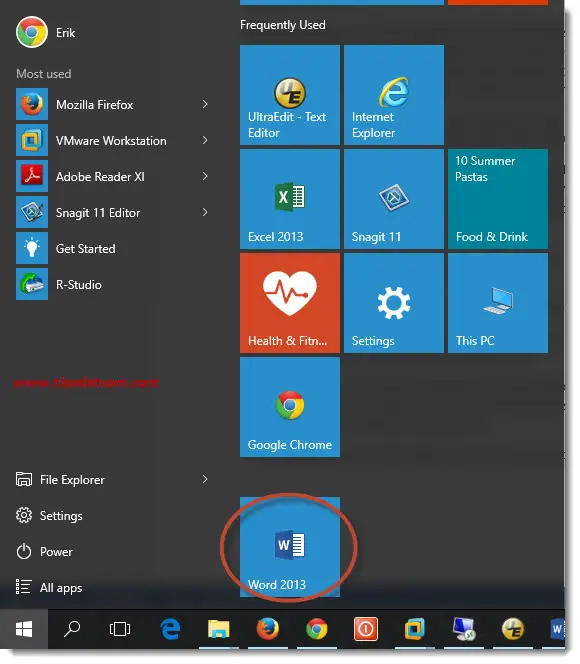
With that said, let's now take a look at how to customize Windows 10 start menu apps. Suppose for instance that you want to add a tile for Microsoft Word. Scrolling a bit down might just reveal Word’s tile in your Windows 10 start menu. If you’re not happy with its place down below in the list, I’ll show you in a minute how you can move start menu items around, but let’s first see how to add programs to the Windows 10 start menu.

If you made sure that the program you’d like to add isn’t already on the list, you can click the “All apps” shortcut in the left part of your start menu.
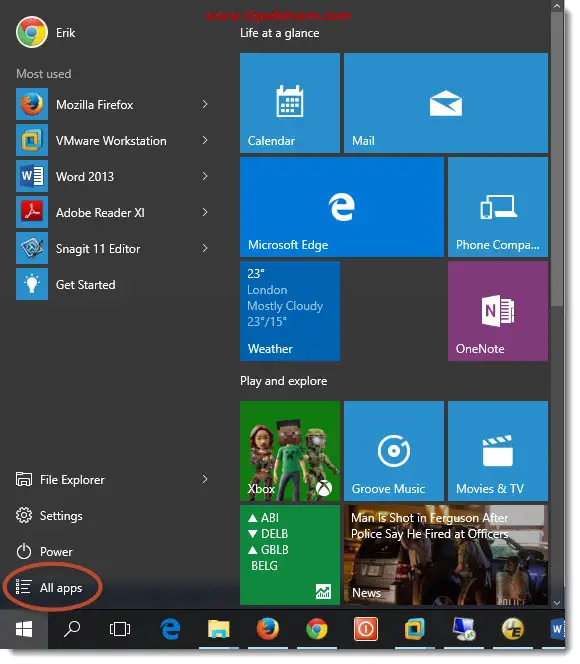
This will bring up a scrollable, alphabetical list of all the installed programs on your computer.
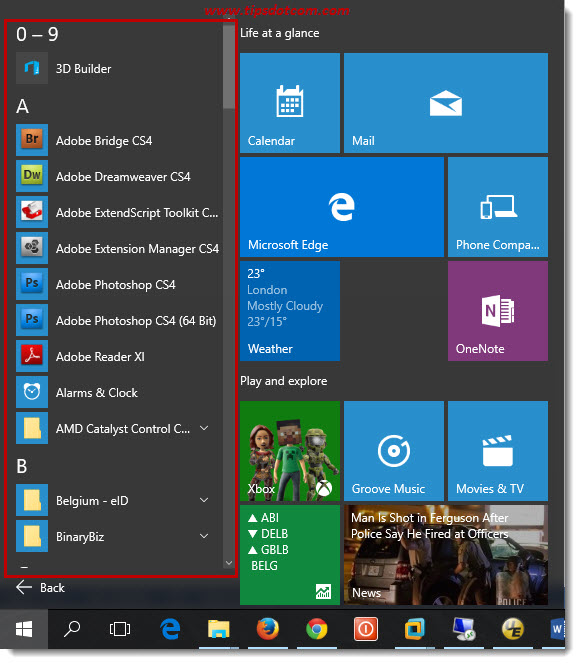
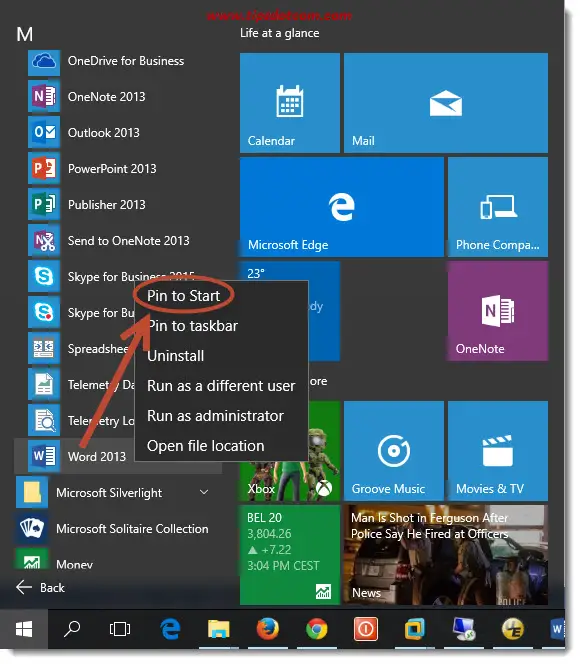
Scroll through the list until you find the application or program you need. Then, right-click the program and select “Pin to start” from the menu.
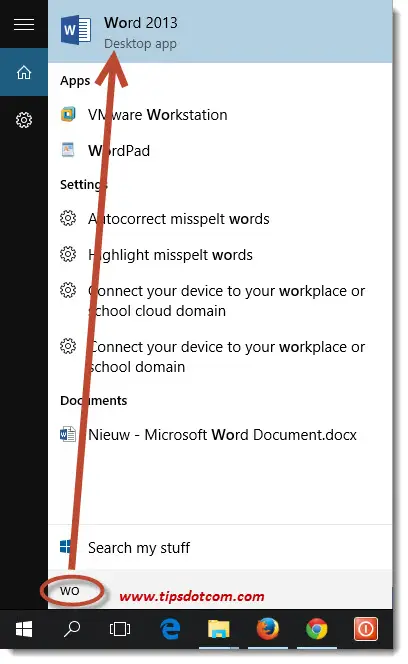
Alternatively, you can click the Windows 10 start button and simply start typing the first letters of the program you want to add to start menu. The Windows 10 search functionality will then automatically bring up a list of matches for your search.
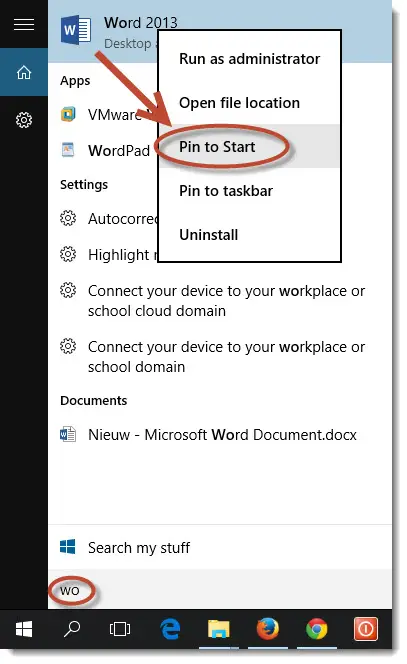
In the list you can now also right-click your desired program and select “Pin to start” from the menu.
As soon as you’ve completed these steps, you’ll notice that your program tile is added to your Windows 10 start menu. Note that you’ll probably have to scroll down to the bottom as Windows will add the new programs at the end of the list.
Rearranging Programs In Windows 10 Start Menu
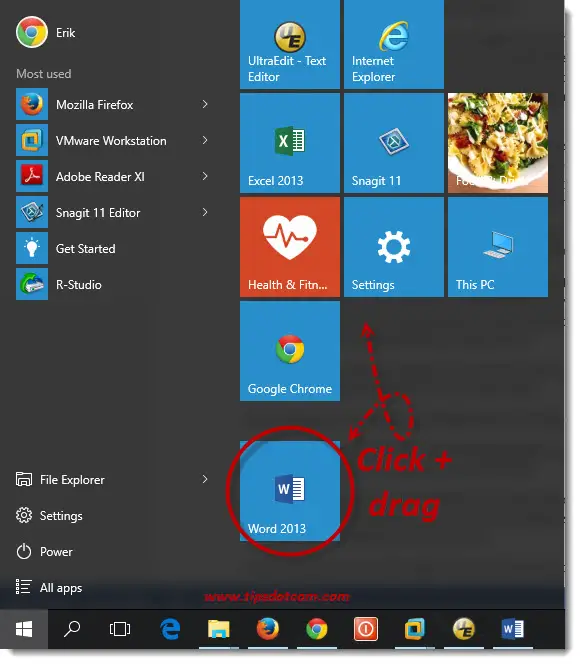
Now that you have your new program tile in the Windows 10 start menu, you might not be happy with its place at the bottom of the list. Luckily you can easily change the position of the program tiles by clicking and dragging them to another location.
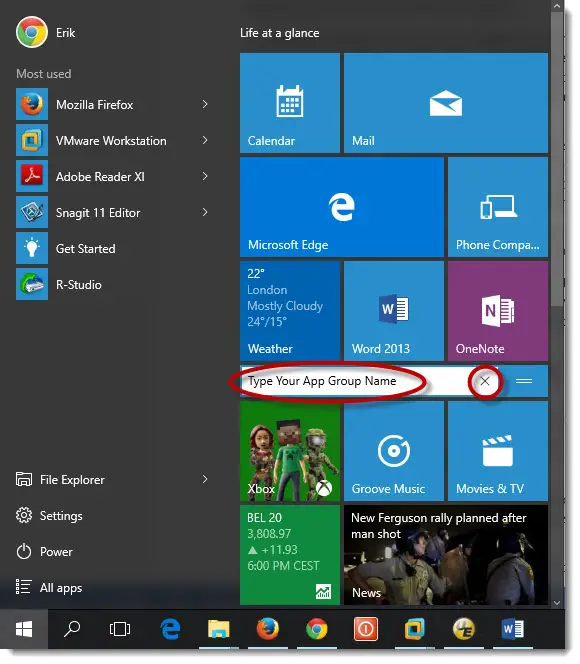
Please also note in the image below how several groups of program tiles are formed and how they are separated by a little extra space between them. You can also see in the image how two small horizontal lines appear on the right in the subheading “Play and explore” by hovering over the heading with the mouse.

You can change the name of your app groups by clicking these two horizontal lines.
Then you will be able to name the app group or remove the app group name by clicking on the “x”.
You can also move entire app groups around by clicking on the app group heading and dragging to a new position.
In order to create a new group, simply click any app tile in any group and drag it beyond the last group.
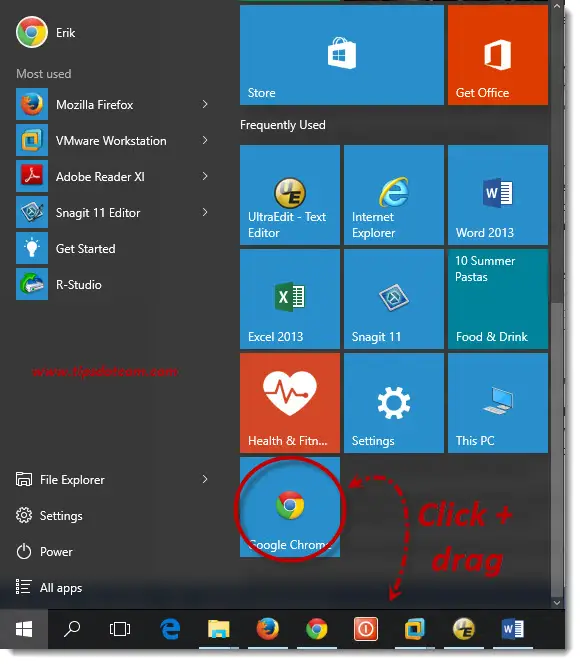
While you are dragging, a subheading bar will appear, indicating that a new group is being made.
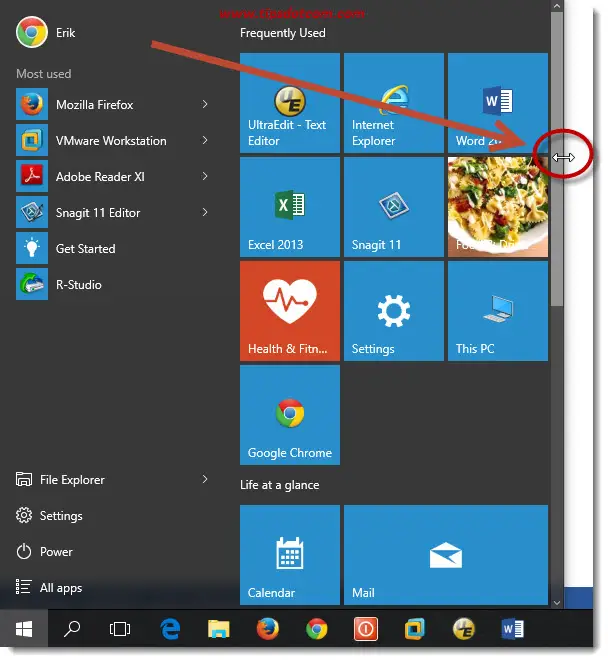
Another option you have to customize Windows 10 start menu features is grabbing the right border of the menu and dragging with your mouse to make the menu wider or less wide. You can also do this with the top border to make the menu taller or shorter.
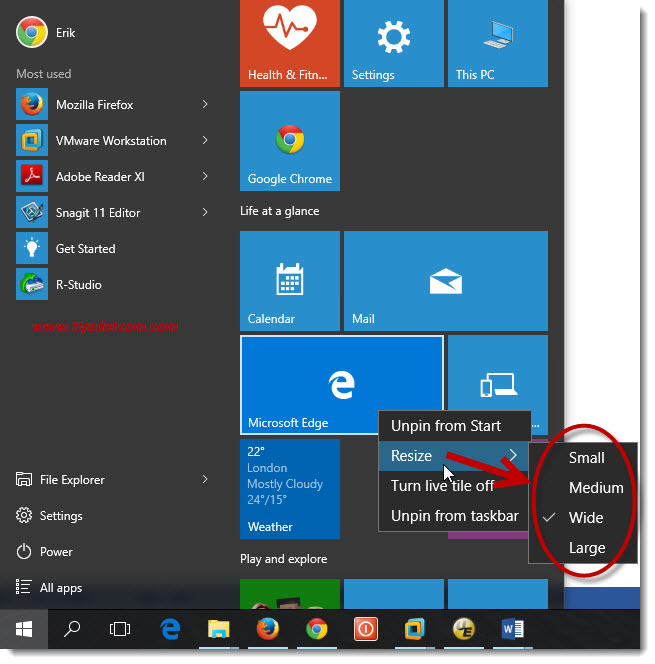
Furthermore you can customize Windows 10 start menu items by playing with their size. Right-click any app tile in the start menu, select “Resize” from the menu and pick whatever size you want it to be. Please note that not all apps offer all the different sizes. Depending on the app, your choices of different sizes may be limited.
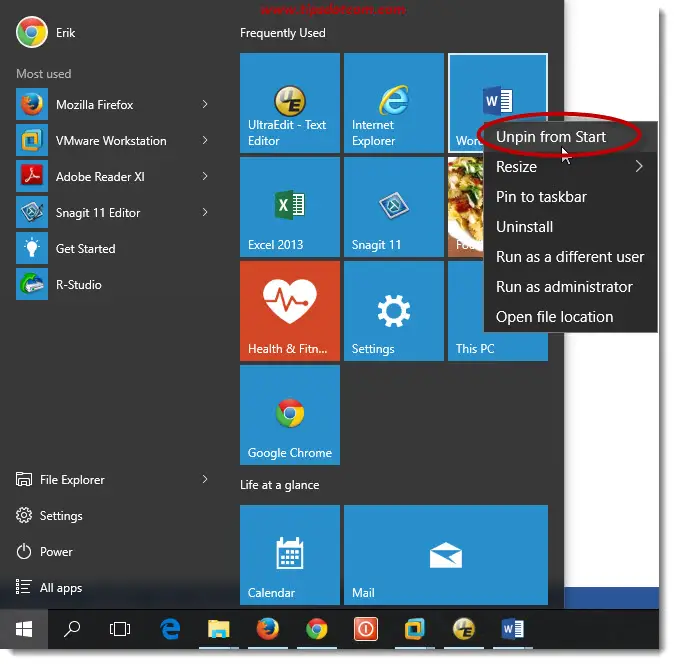
Removing apps from the Windows 10 start menu is also pretty straightforward: simply right-click the app that you want to remove and select “Unpin from start”.
Please note that if you are working with virtual desktops, the changes you make to your start menu will appear across all of your desktops. Creating a custom start menu for each virtual desktop is not supported.
I hope this article has helped you to understand how to customize Windows 10 start menu apps. Please take a brief moment and leave a short comment below, I’d appreciate it, thanks!
Related articles: Windows 10 Life At A Glance - Windows 10 Aero Snap - Add My Documents to the Windows 10 start menu - Windows 10 Start Menu Not Working - Windows 10 Start Menu - Disable notifications in Windows 10.
If you've enjoyed this article or found it useful, I'd appreciate it if you'd let me know by clicking the Like (or Share) button below. Thank you!


New! Comments
Have your say about what you just read! Leave me a comment in the box below.